


A wiggling, jiggling, articulated alligator from Good Art Hlywd. Made by hand and with love at Good Art’s very own, LA foundry.
METAL: .925 sterling silver
DETAILS:
-Layered, articulated body
-Goosebump motif on scales
-Gator-jaw bail
-Hand burnished & polished
-Cast at the Good Art foundry in Los Angeles
-Good Art original design
ORIGIN: Made in USA
Nothing speaks to Good Art’s canny balancing act between the artistic and the eccentric quite like the Jiggly Gator. It’s goosebump’d from nape to tail, with the charm’s bail cleverly incorporated into the alligator’s toothy mouth. Designed, cast, and finished in-house and by hand, it’s replete with the life, fun, and next-level detail that we’ve come to expect from Good Art - but that doesn’t make it any less impressive.
For 22K gold enquiries, please email info@rivetandhide.com
All jewellery is made in-house at Good Art’s LA foundry. Precious stones can be incorporated into any customization. Custom orders can be easily arranged. We carry an extensive range of Good Art jewellery across both of our stores. Come and visit us to see the collection up close and personal.
FREE UK delivery on orders over £50.
Shipping costs £8 to UK addresses for orders under £50.
For international orders, please see our full shipping and delivery details.
FREE European delivery on orders over €200.
Standard delivery is €30 for European orders under €200
For further information, please see our full shipping and delivery details.
FREE delivery worldwide on orders over $200.
Shipping costs $25 for orders under $200
Orders to USA, Canada, Mexico & Far East - 2 working days. (Next working day to NYC).
Australia and New Zealand - 3-4 working days.
For international orders, please see our full shipping and delivery details.
If you are not completely satisfied with your purchase, you can return it to us within 21 days for an exchange or refund.
For more information, please see our Returns & Exchanges page.

Stage 1: The waist
- Button up the jean.
- Lay flat with the top waist band evenly flat on the back waist band.
- Measure from one side to the other keeping the jean flat & double the measurement.


Stage 2: The hip
- Measure 3 inches or 7.5cm from the crotch stitch.
- Measure from side to side flat across the jean at this point.

Stage 3: Front rise
- Lay flat and measure from crotch seam to top of jean with top button fastened

Stage 4: Back rise
- Measure from crotch seam to top of the back of the jean.

Stage 5: Thigh
- Lay flat and measure from crotch across to outside of leg.


Stage 6: Knee
- Lay flat and measure 13” or 33cm from crotch down inside seam of jeans
- From here measure from one side of the jean to the other.

Stage 7: hem width/leg opening
- With the jean flat measure from one side of the leg opening to the other.
- NB with very heavy denim 18oz and above measure the entire circumference of the exterior of the hem using a measuring tape and divide by 2 for a more exact figure.

Stage 8: Inseam/inside leg
- Lay the jean flat with the inseam at the centre.
- Following the inside seam measure from the crotch to the end of the leg.
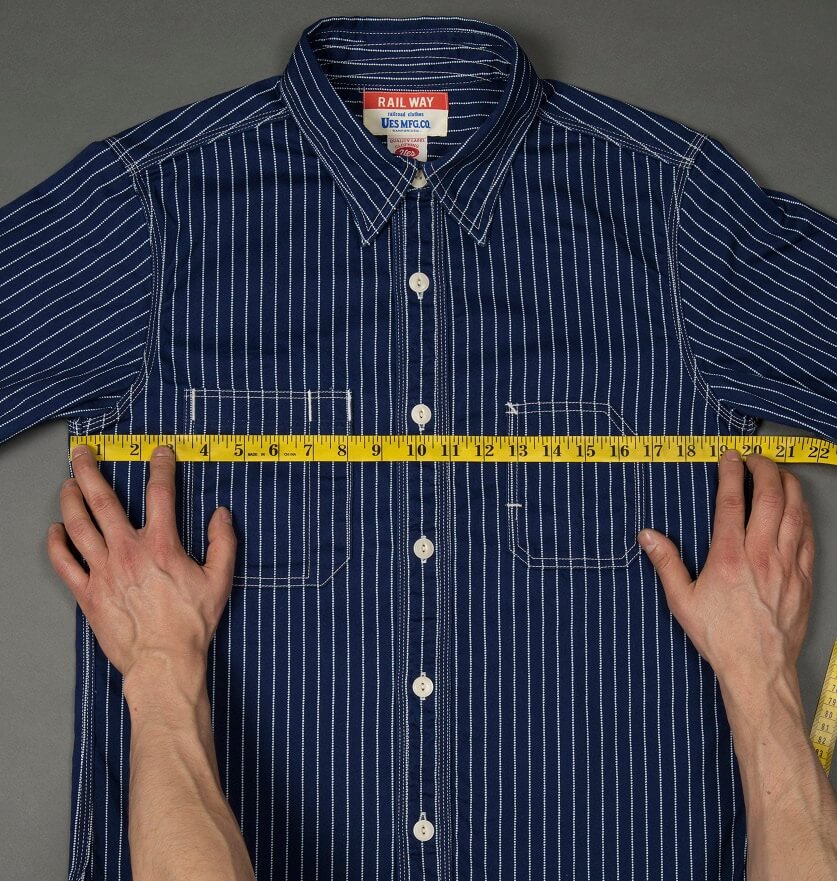
Stage 1: Chest
- Measure from pit to pit and double the reading.
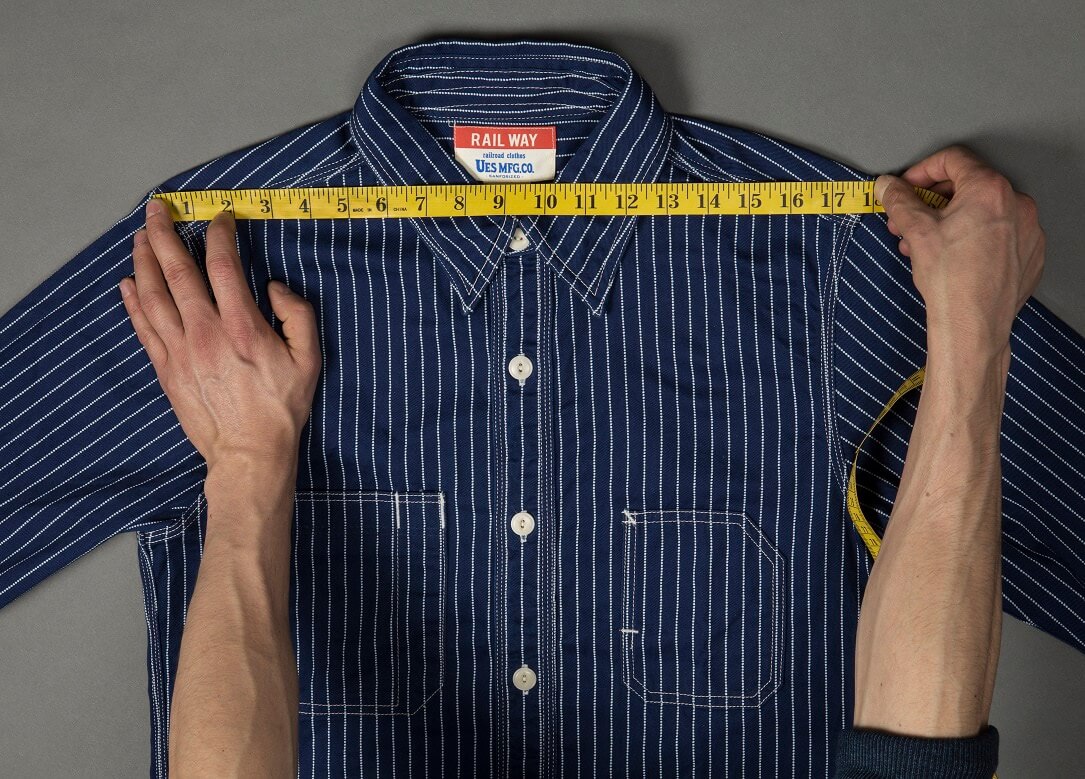
Stage 2: Shoulder
>Measure across the top from one shoulder seam to the other.
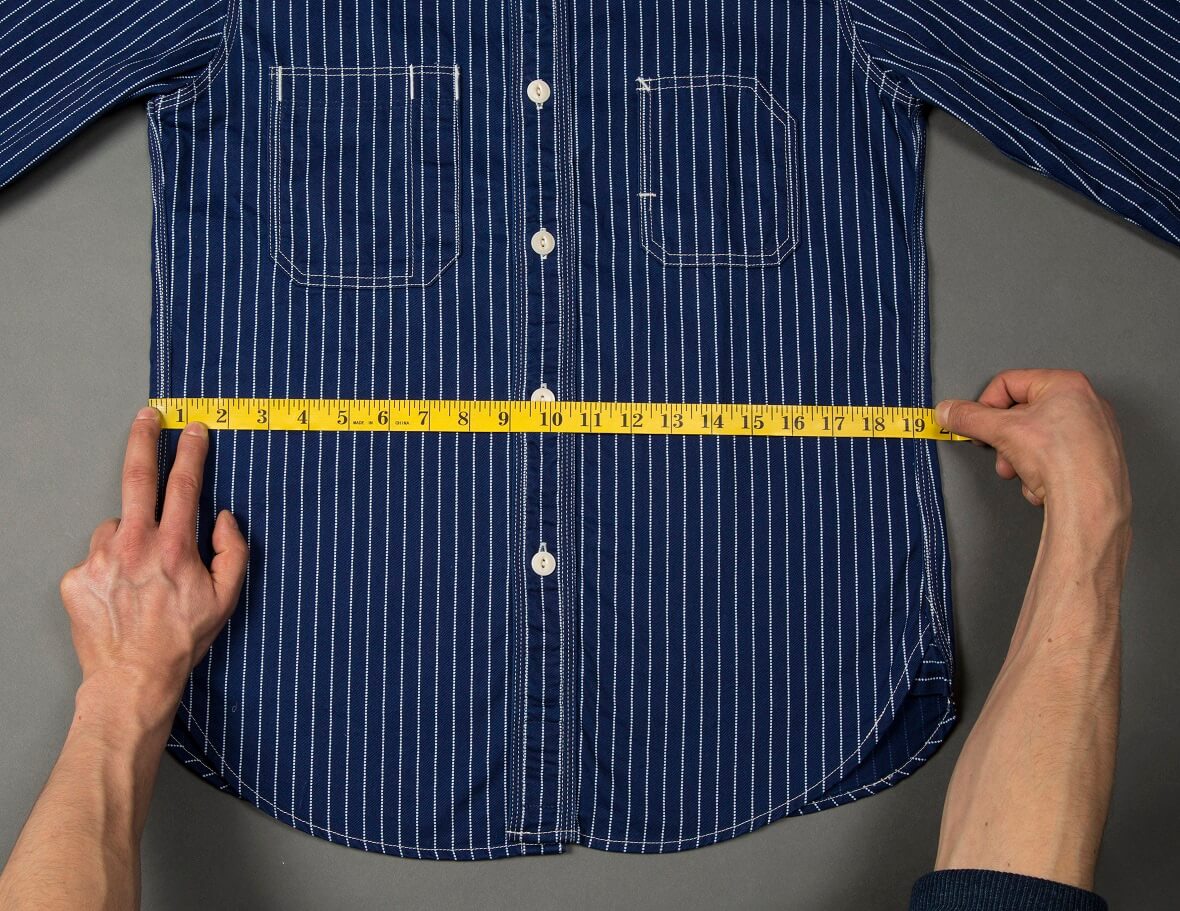
Stage 3: Waist
We measure the narrowest part of the garment outer seam to outer seam between the pit and the opening. If, however, the shirt has gussets, the waist will correspond to the the opening measurement.
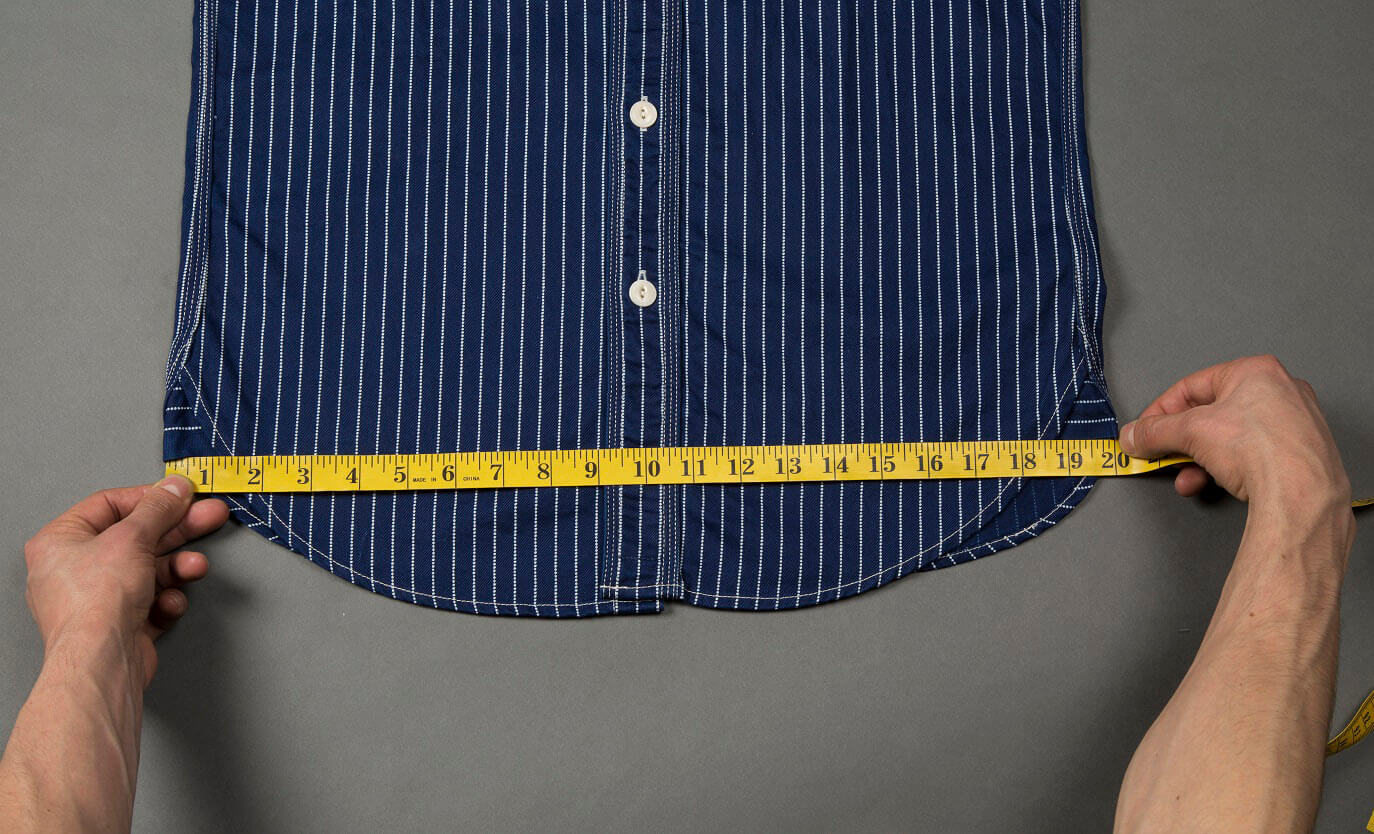
Stage 4: Opening
Here we take a cross measurement from seam to seam at the bottom of the shirt.
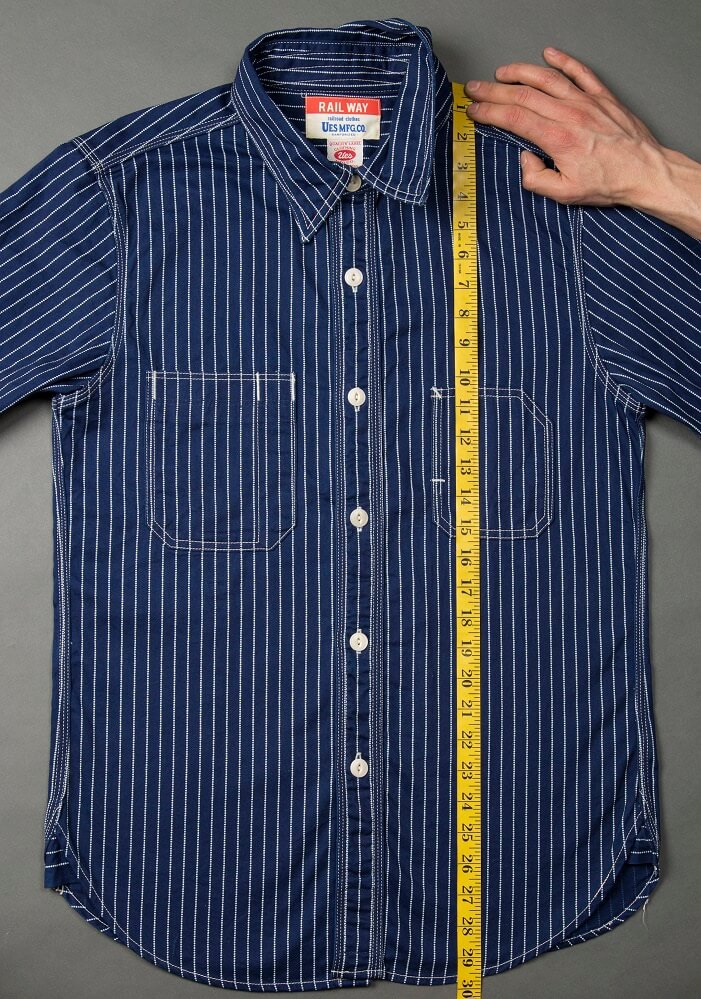
Stage 5: Length
Measure from the top of the shoulder by the collar to the bottom of the garment.
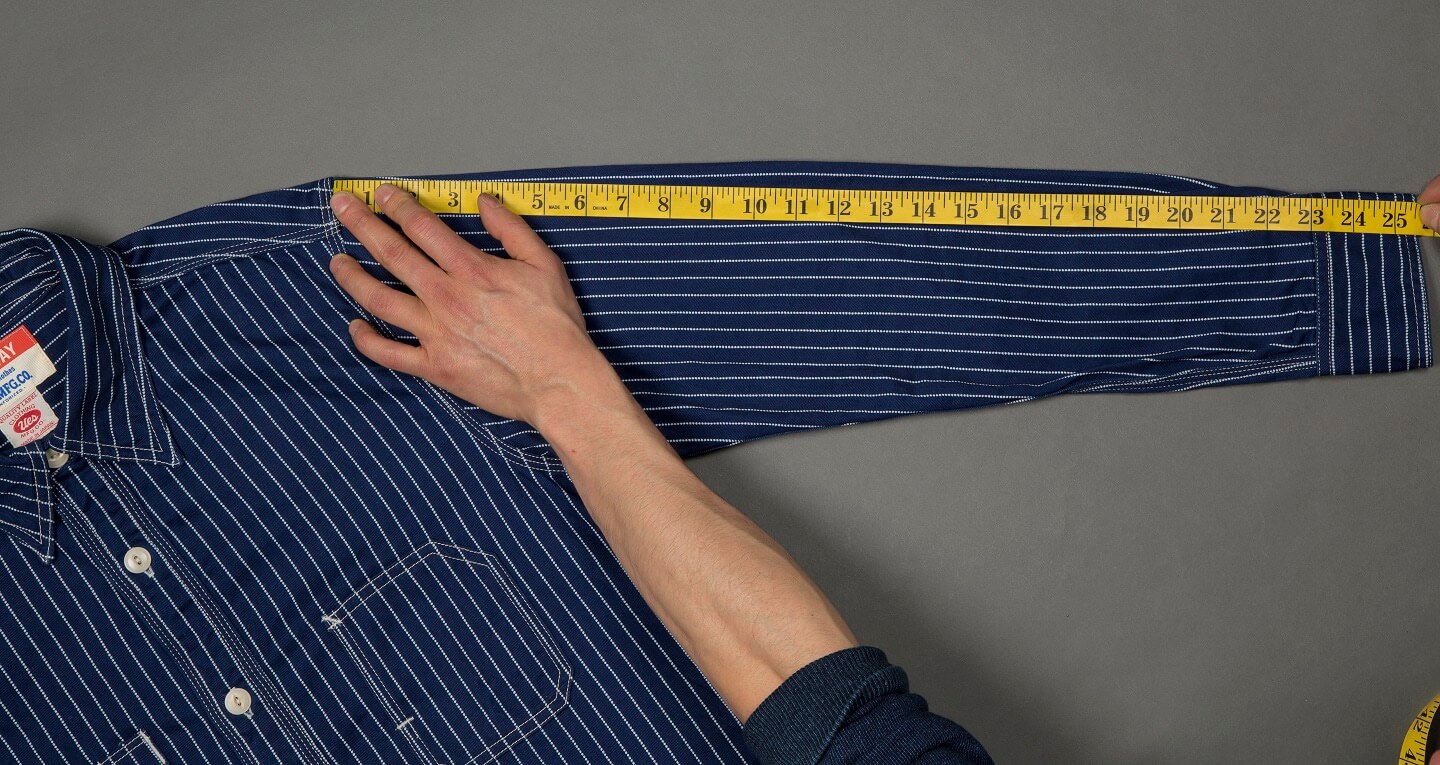
Stage 6: Sleeve
Measure from the top of shoulder seam to the cuff’s edge.