Fine Creek Leathers Custom Leon Jacket - 1.3mm Black Shinki Horsehide
In stock
This version of Fine Creek Leathers’ Leon uses a 1.3mm-thick horsehide that has been naturally teacore tanned at the fabled Shinki Tannery. This special tannage gives the jacket a softer, smokier black from the outset and promises to reveal warm tobacco-brown undertones more quickly than traditional methods, offering a head start on the kind of patina typically earned over years of wear.
LEATHER: Horsehide
STYLE/FIT: Slim
COLOUR: Teacore Black
METHOD: Veg-tanned, aniline finished
DETAILS:
-Double Rider, asymmetric style
-1.3mm thick teacore horsehide from Japan's Shinki tannery
-No belt or epaulettes
-Custom tanning recipe
-100% cotton, black pigment dyed liner
-Vintage steel hardware
-Sewn in-house at Fine Creek Leathers' workshop in Tokyo
ORIGIN: Made in Japan
PLEASE NOTE THAT ALL OUTLET ITEMS ARE FINAL AND NON-RETURNABLE
This custom variant of Fine Creek Leathers’ Leon jacket uses a naturally veg-tanned “teacore” leather, specially developed to accelerate the ageing process. Teacore tanning is a slow, organic method that creates a rich, layered finish—earthy tobacco browns hidden beneath smoky black topcoats.
In collaboration with the renowned Shinki Tannery, Fine Creek have fine-tuned their method so the Leon’s black surface wears away more quickly than usual, revealing those warm browns sooner. This doesn’t compromise the jacket’s integrity—instead, it brings out beautiful depth and character that would otherwise take years to achieve. With just a little wear, you’ll start to see the kind of earthy patina usually found on well-aged vintage jackets.
Swipe through the images to get an idea of how his jacket ages. Those blacks start to darken and some lovely contrast starts to set in.
Read our Guide to Teacore Tanning here.
This particular Leon has had the belt and epaulettes removed for a cleaner, more refined look. Fine Creek’s in-house sewing techniques create subtle tension at the seams, encouraging the leather to pucker and shape uniquely as it ages. The result is a truly exceptional jacket—no two are ever exactly alike.
Elliot wears a size 42 jacket. He is 185cm tall and weighs 74kg / 6ft 1" and 163 lbs.
Important: The best way to determine the size you need is to measure a similar item you already own and compare with the actual sizing as per the table below. Do not go by alone.
| SIZES | 38 | 40 | 42 | 44 | 46 |
|---|---|---|---|---|---|
| Chest | 39 | 40 | 41" | 44 | 45 |
| Waist | 18.75 | 19.5 | 20.25 | 21 | 21.75 |
| Shoulder | 17 | 18 | 18.5 | 19.5 | 20.5 |
| Opening | 18.75 | 19.5 | 20.25 | 21 | 21.75 |
| Vertical Length | 24.5 | 25.5 | 26.5 | 27.25 | 27.75 |
| Sleeve Length | 24.5 | 25 | 25.75 | 26.25 | 26.25 |
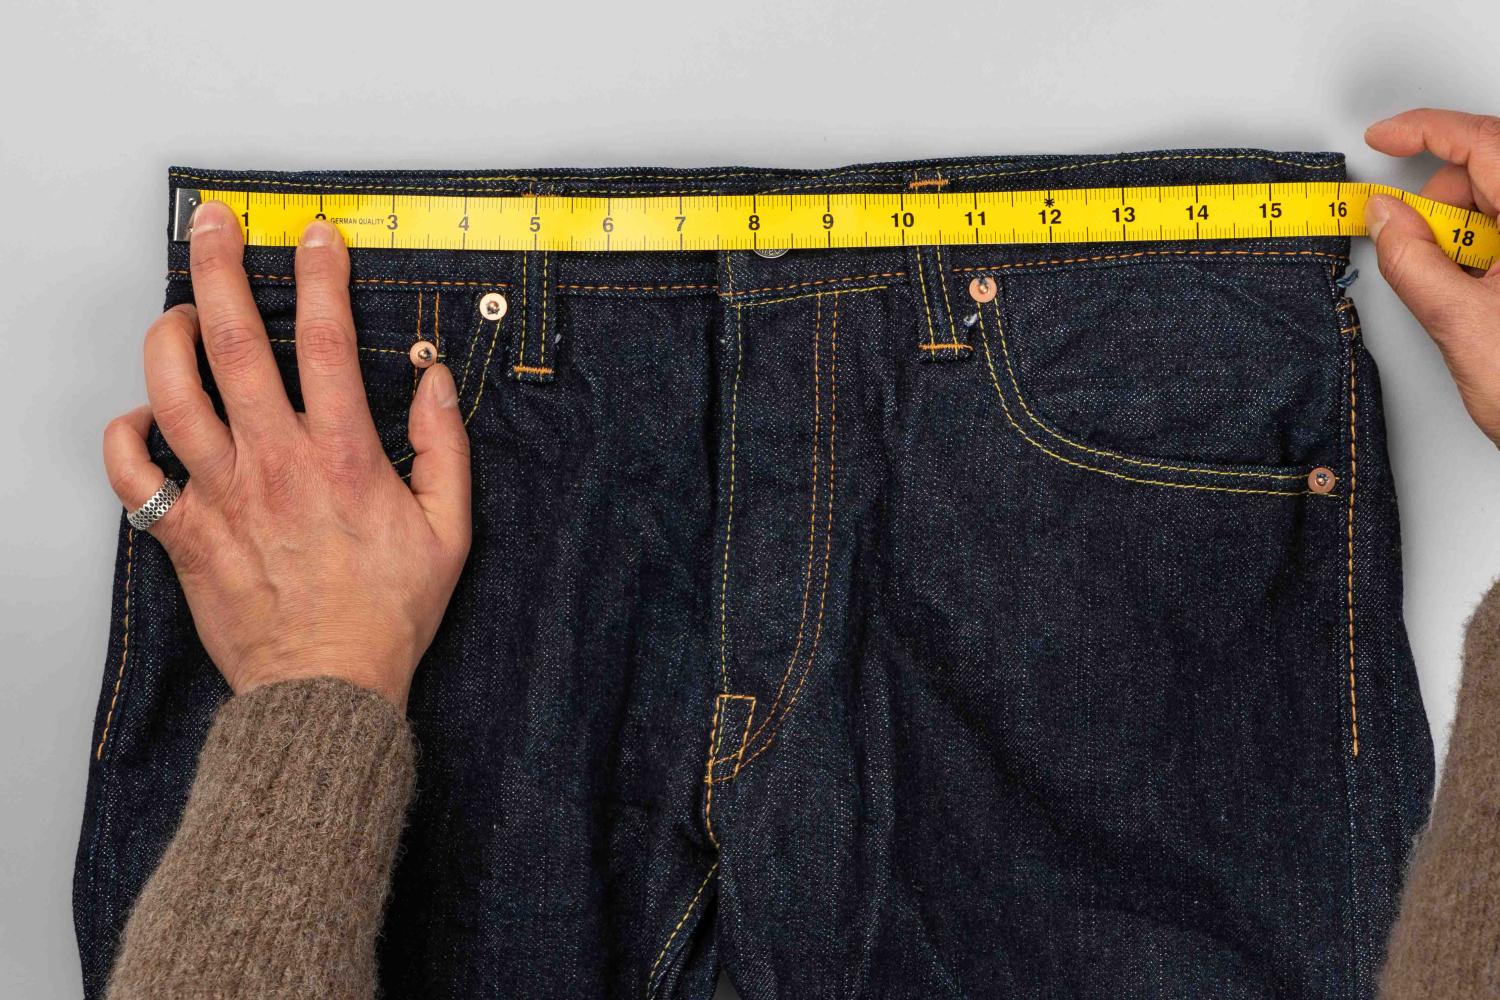
Stage 1: The waist
- Button up the jean.
Lay flat with the top waist band evenly flat on the back waist band.
Measure from one side to the other keeping the jean flat & double the measurement.
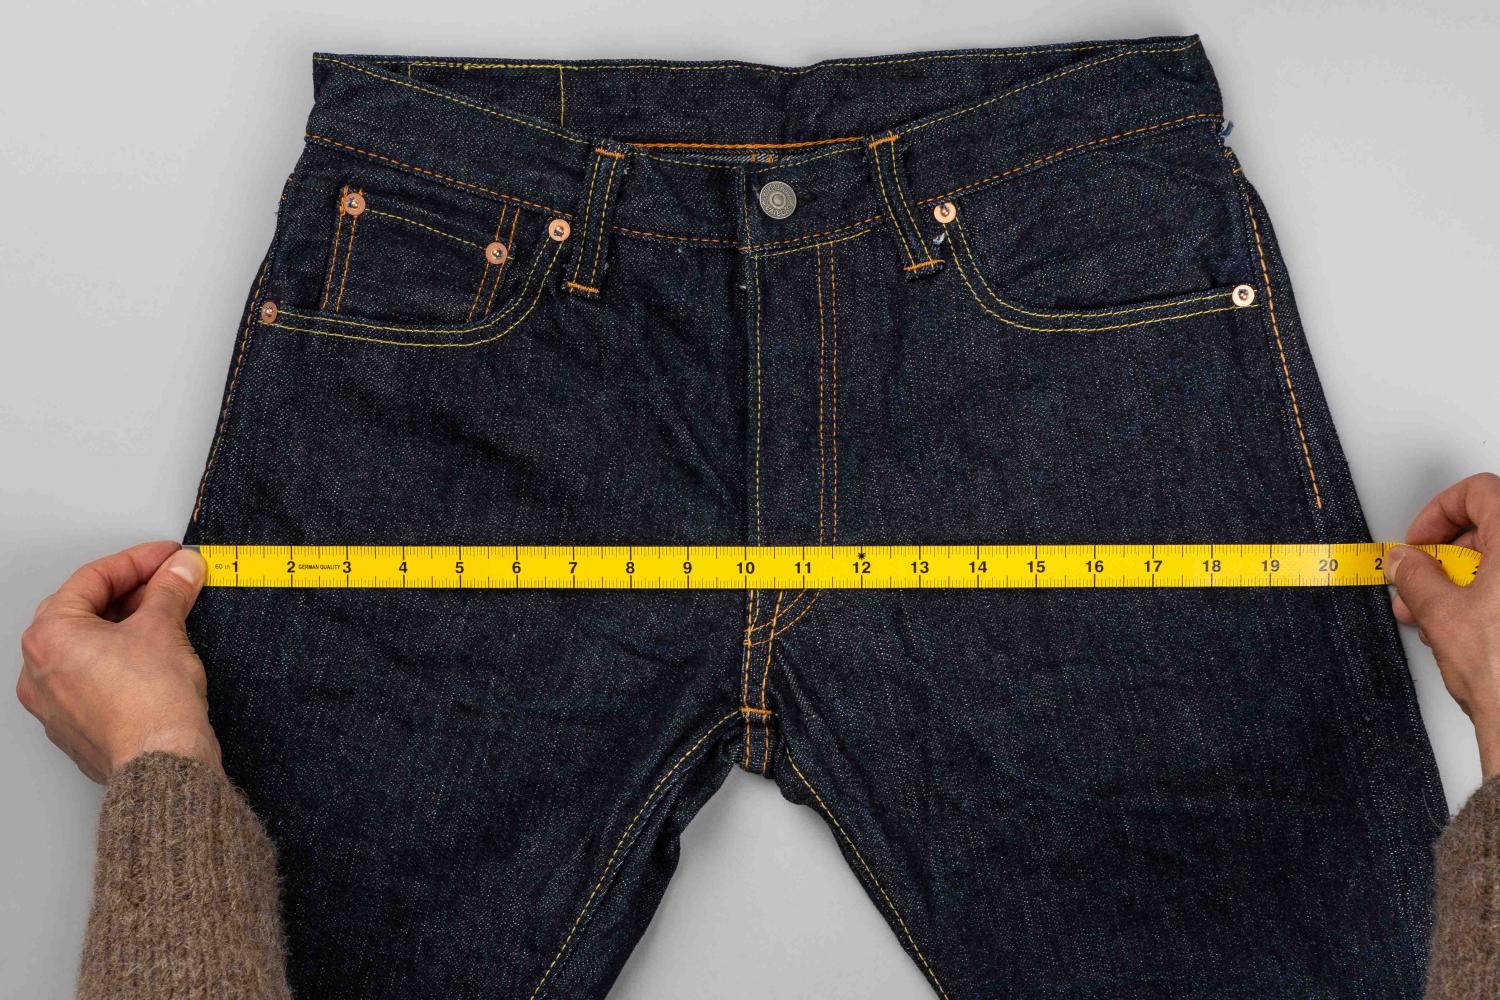
Stage 2: The hip
- Measure 3 inches or 7.5cm from the crotch stitch.
Measure from side to side flat across the jean at this point.

Stage 3: Front rise
- Lay flat and measure from crotch seam to top of jean with top button fastened

Stage 4: Back rise
- Measure from crotch seam to top of the back of the jean.

Stage 5: Thigh
- Lay flat and measure from crotch across to outside of leg.


Stage 6: Knee
- Lay flat and measure 13” or 33cm from crotch down inside seam of jeans
From here measure from one side of the jean to the other.
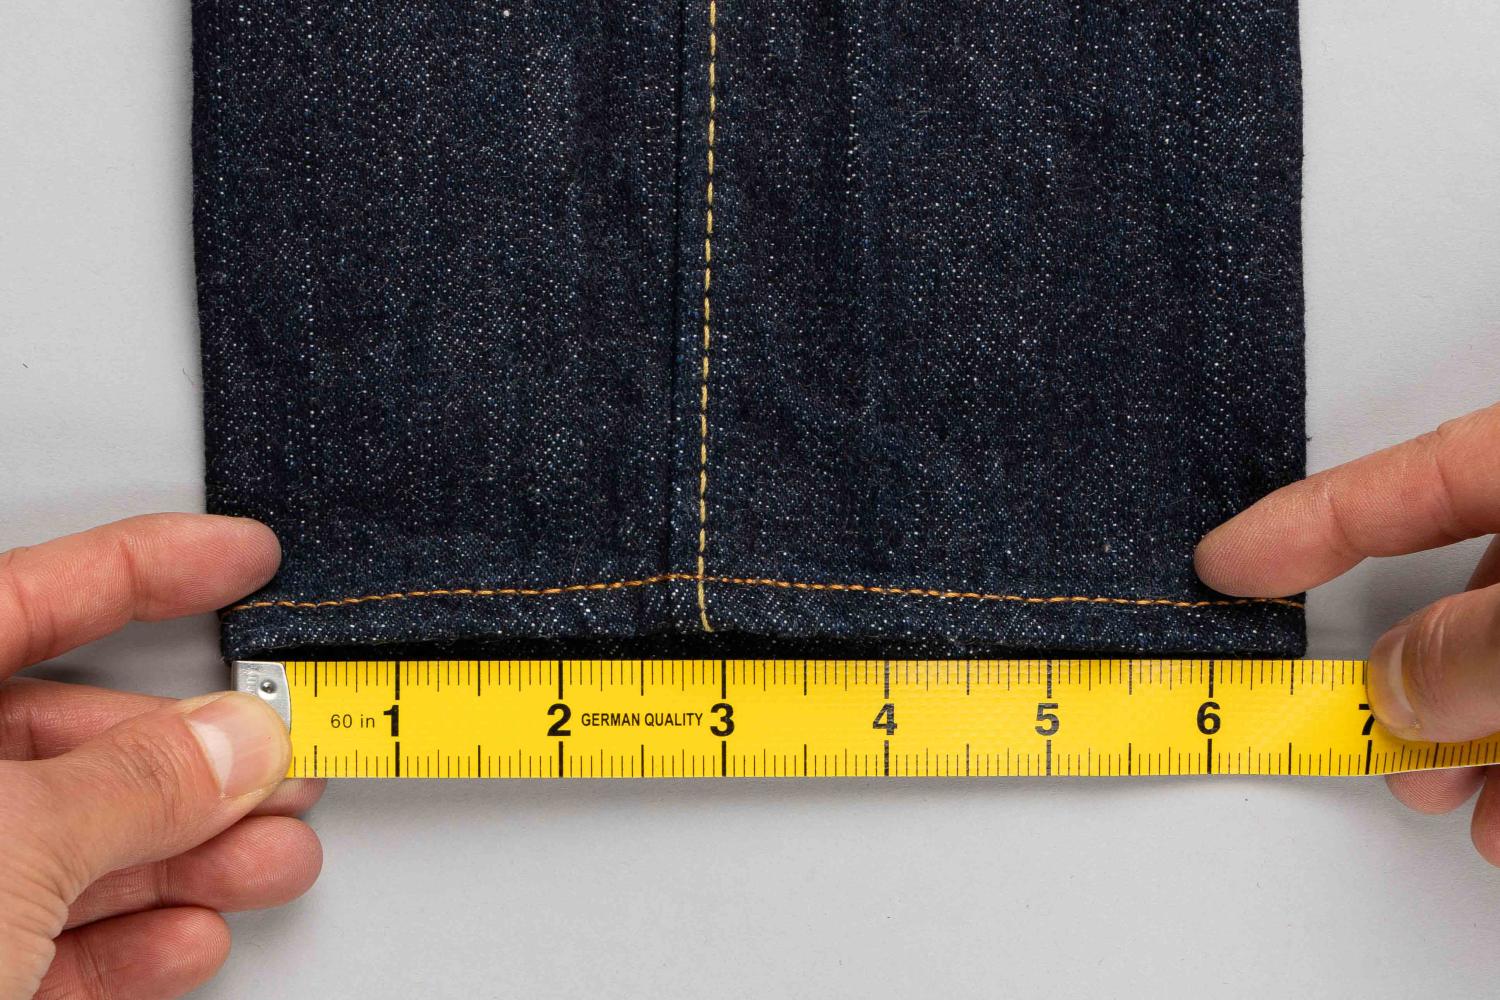
Stage 7: hem width/leg opening
- With the jean flat measure from one side of the leg opening to the other.
NB with very heavy denim 18oz and above measure the entire circumference of the exterior of the hem using a measuring tape and divide by 2 for a more exact figure.
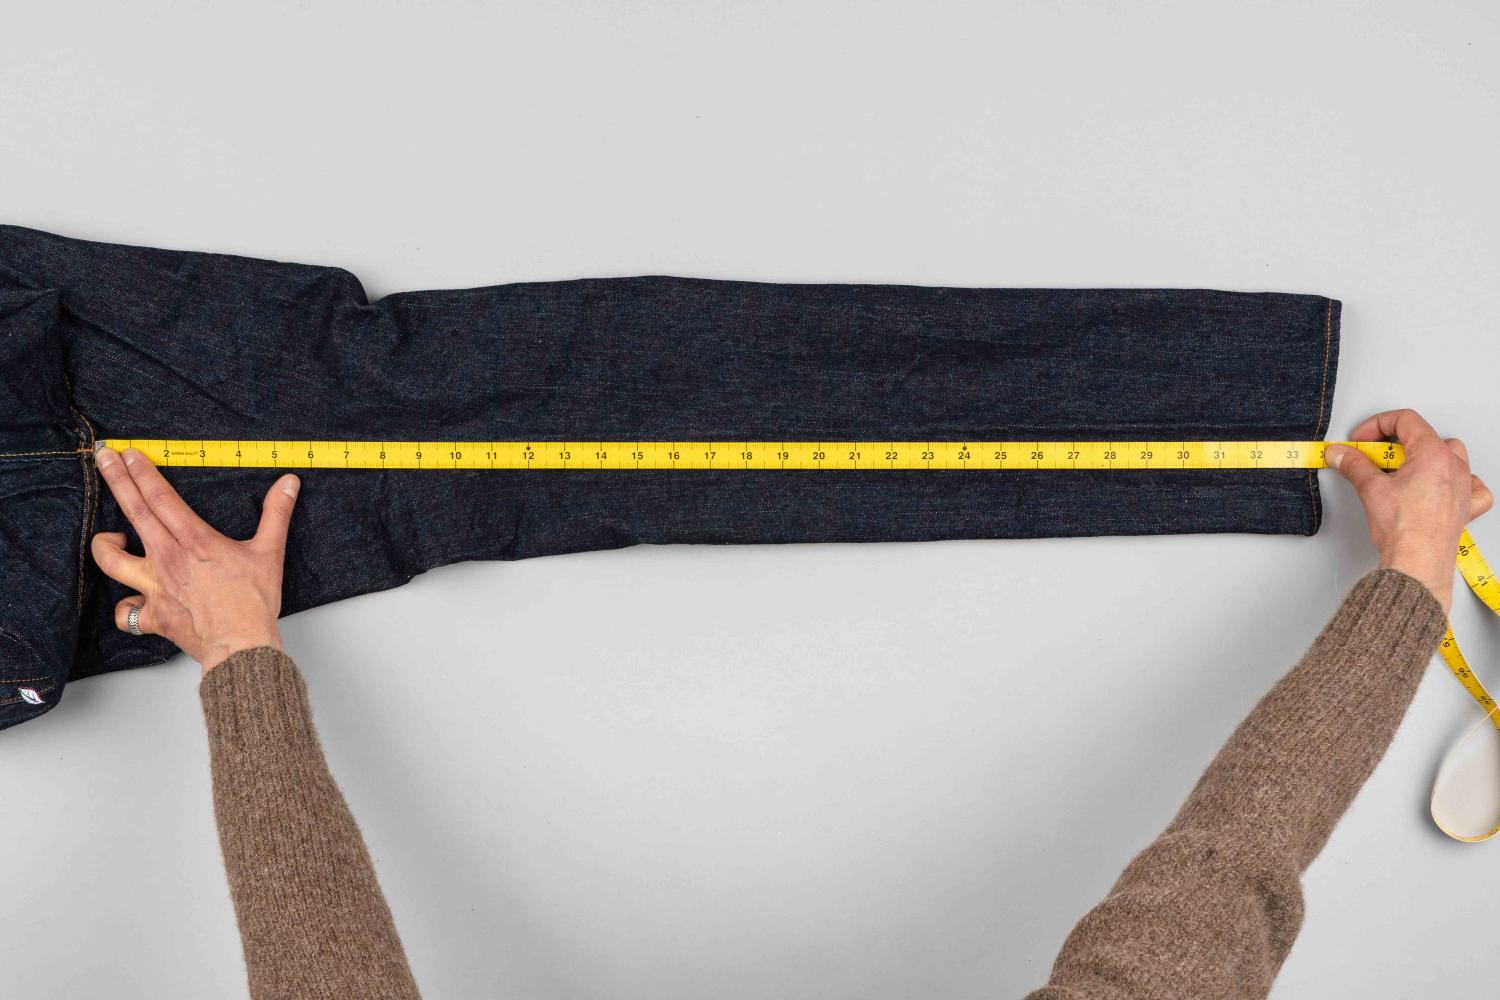
Stage 8: Inseam/inside leg
- Lay the jean flat with the inseam at the centre.
Following the inside seam measure from the crotch to the end of the leg.
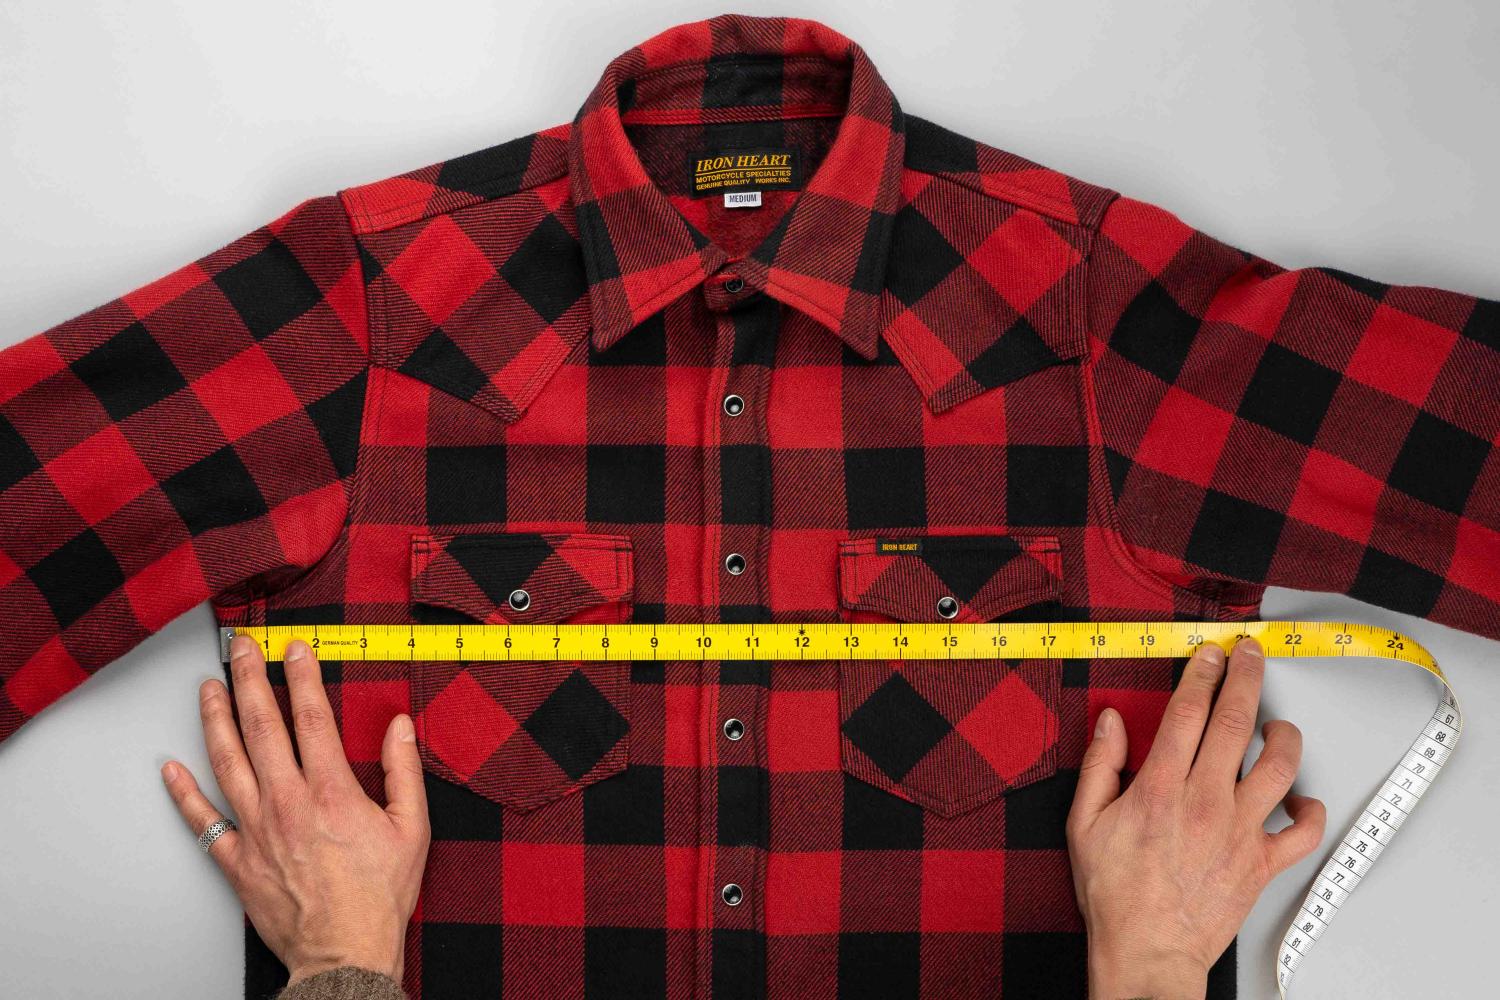
Stage 1: Chest
- Measure from pit to pit and double the reading.
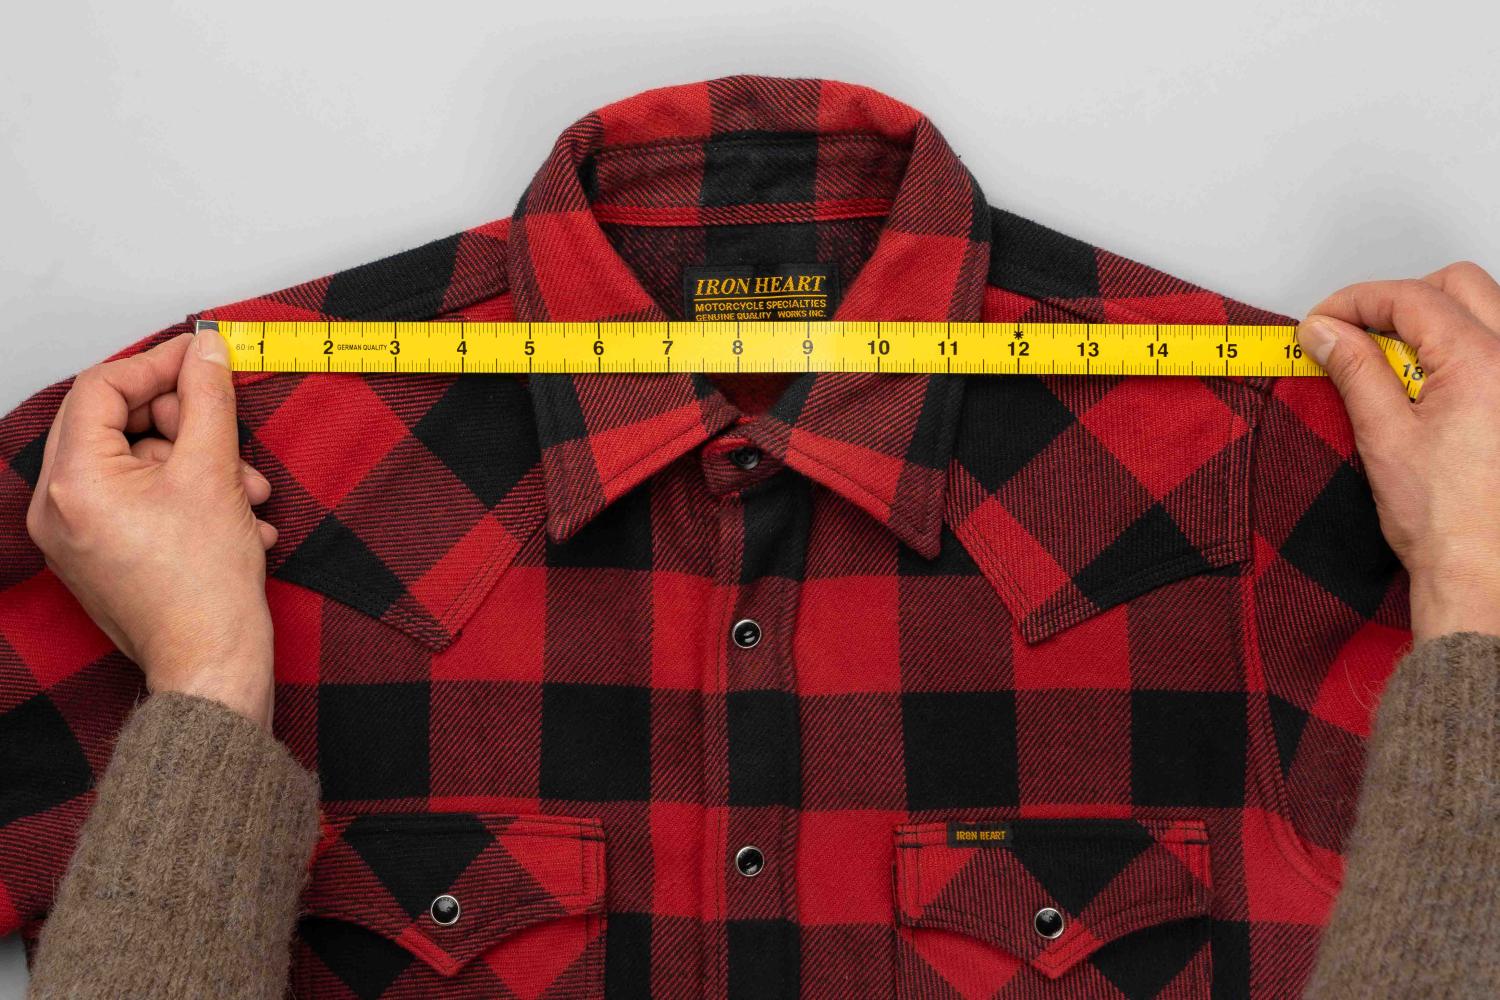
Stage 2: Shoulder
- Measure across the top from one shoulder seam to the other.
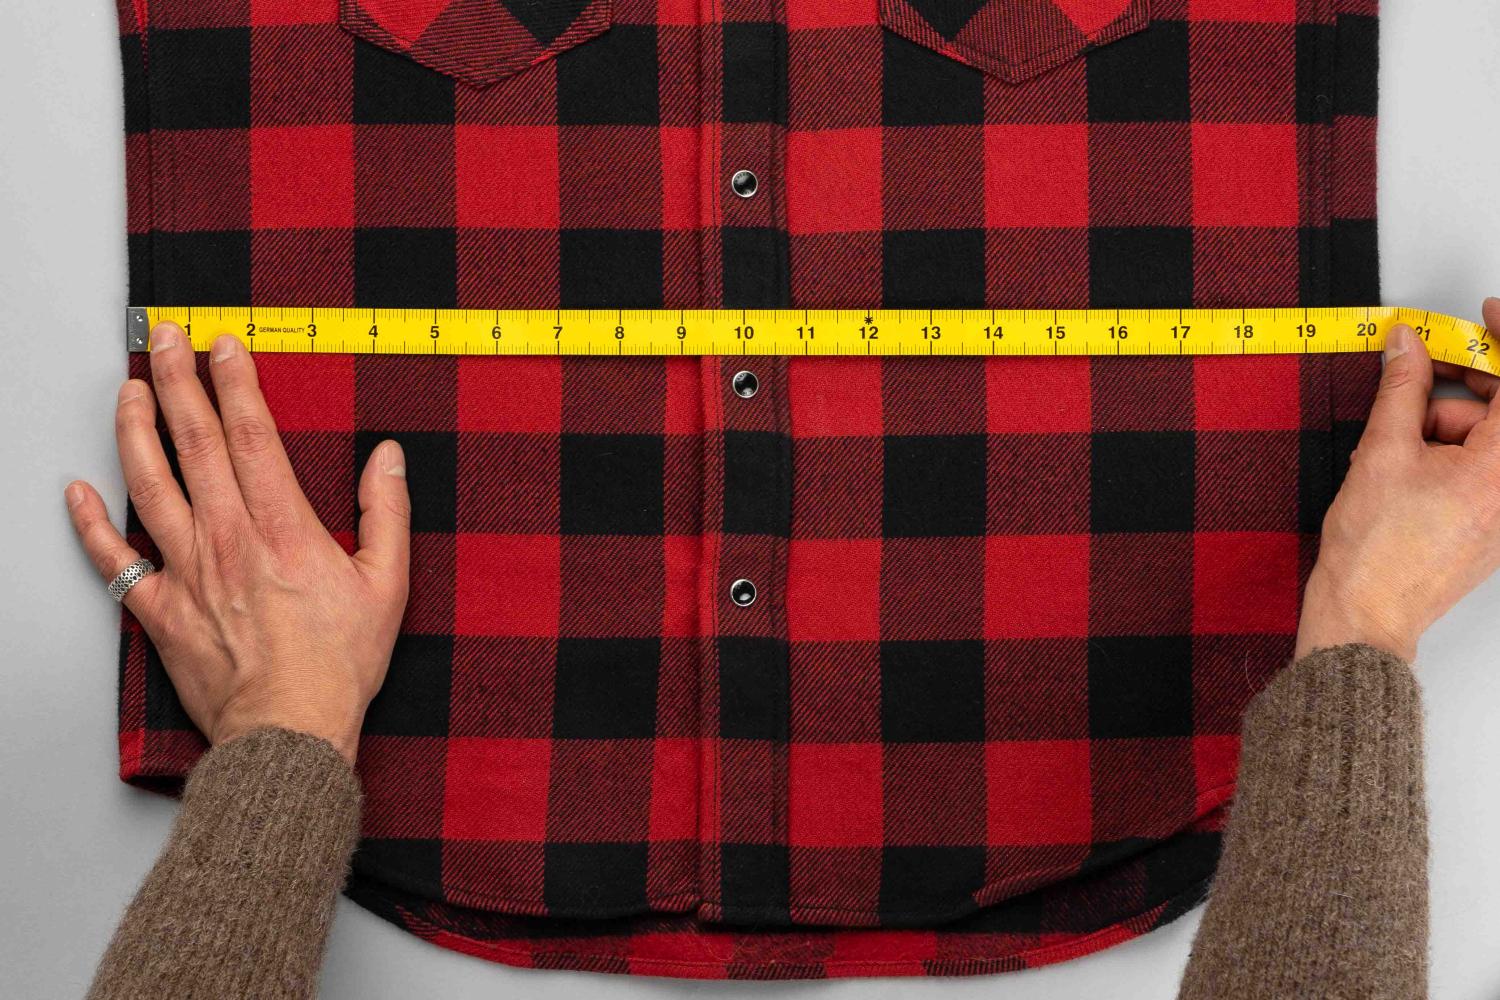
Stage 3: Waist
We measure the narrowest part of the garment outer seam to outer seam between the pit and the opening. If, however, the shirt has gussets, the waist will correspond to the the opening measurement.
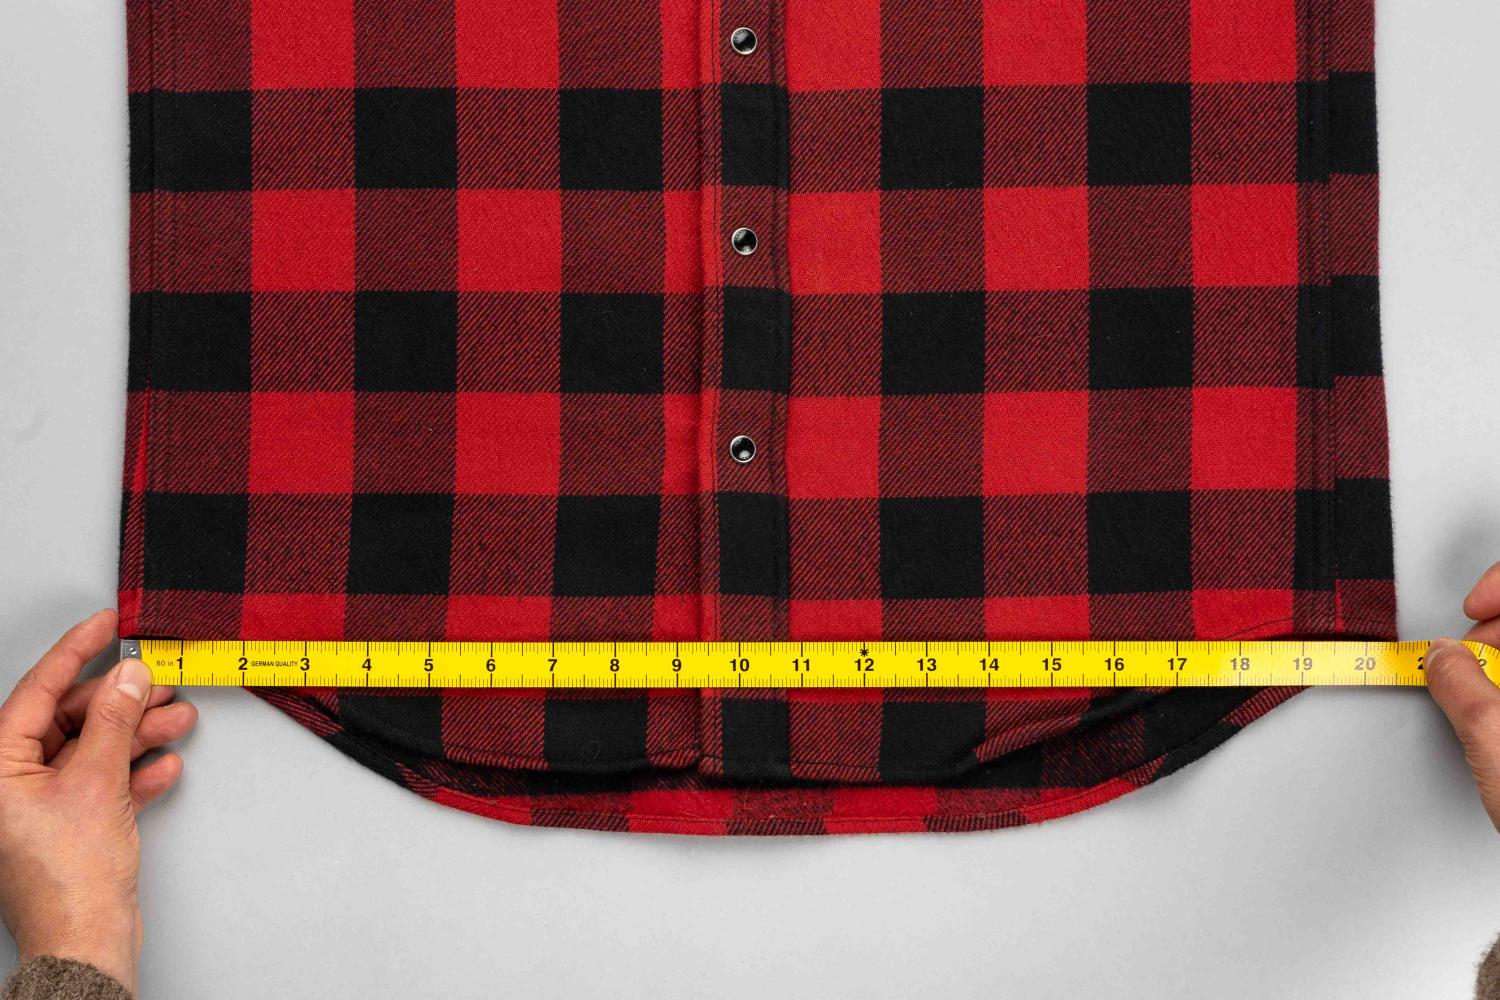
Stage 4: Opening
Here we take a cross measurement from seam to seam at the bottom of the shirt.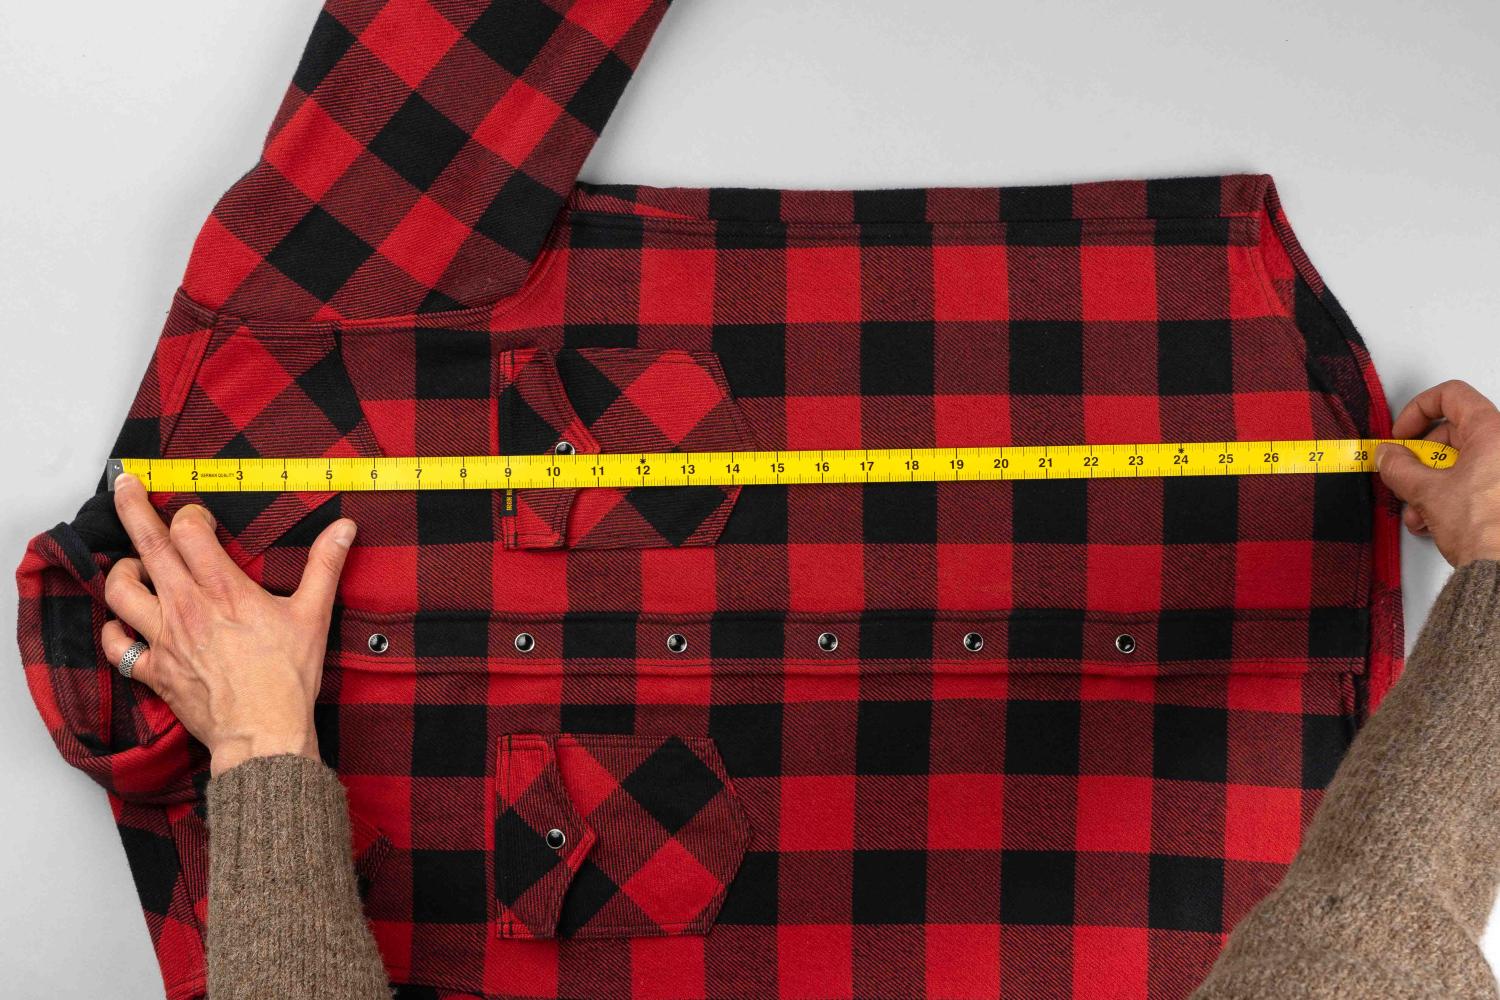
Stage 5: Length
Measure from the top of the shoulder by the collar to the bottom of the garment.
Stage 6: Sleeve
Measure from the top of shoulder seam to the cuff’s edge.
FREE UK delivery on orders over £50.
Shipping costs £8 to UK addresses for orders under £50.
For international orders, please see our full shipping and delivery details.
If you are not completely satisfied with your purchase, you can return it to us within 21 days for an exchange or refund.
For more information, please see our Returns & Exchanges page.