Samurai Inlay Loopwheeled T-Shirt - Brick Red
In stock
Samurai’s Inlay Tees are tube-knit on Japanese hanging loopwheelers using aged cotton. Here in Brick Red.
FABRIC: 100% aged cotton
STYLE/FIT: Regular
COLOUR: Red
METHOD: Washed
DETAILS:
-Loopwheeled in Wakayama
-Inlay knit for added thickness and texture
ORIGIN: Made in Japan
Samurai’s Inlay Solid t-shirts are a real labour of love. They’re slowly loopwheeled in Wakayama using aged cotton. Cotton ageing refers to the process of allowing the cotton bales to breathe and decompress. While cotton bales typically arrive compacted – Samurai's cotton is left to sit in a temperature and humidity-controlled room – thereby allowing it to naturally expand. This ‘ripening’ process can take a month or two, but it really brings out the cotton’s naturally thick, full, fluffiness.
To slow things down just that little bit further, the aged cotton thread is then passed through hanging loopwheelers to be inlay knit. The more complicated inlay knitting method reduces rate and yield, but results in a substantial tee with unbeatable levels of comfort and durability. The inlay knitting technique also gives the tees a textured, terry-fleeced feel on the inside. These are beautiful, small-batch tees that really stand in testament to Samurai’s eye for detail.
The Inlay tee fits slim across the arms and body with a higher-set neckline. We recommend sizing up one from your usual Samurai tee size.
Elliot wears a size Large t-shirt. He is 185cm tall and weighs 74kg / 6ft 1" and 163 lbs.
Important: The best way to determine the size you need is to measure a similar item you already own and compare with the actual sizing as per the table below. Do not go by tagsize alone.
| INCHES | S | M | L | XL | XXL |
|---|---|---|---|---|---|
| Chest | 35 | 37 | 39 | 41 | 43 |
| Shoulder Width | 15.5 | 16.25 | 17 | 18 | 18.25 |
| Vertical Length | 24.25 | 26 | 27 | 28.25 | 28.5 |
| Sleeve Length | 6.75 | 7.25 | 7.5 | 8 | 8.25 |
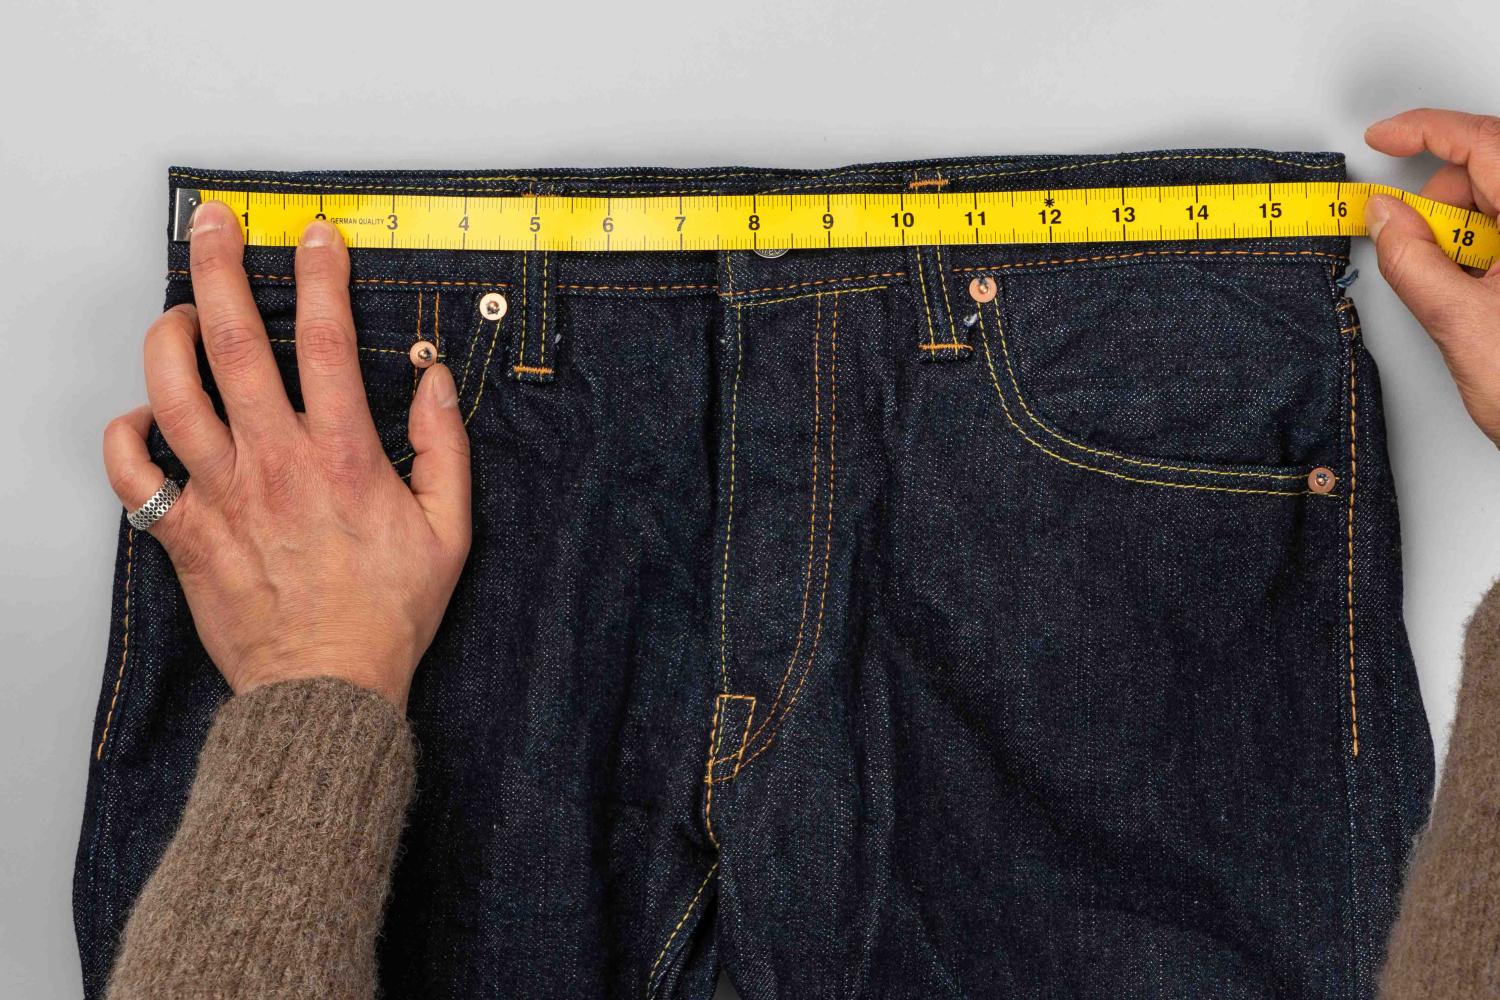
Stage 1: The waist
- Button up the jean.
Lay flat with the top waist band evenly flat on the back waist band.
Measure from one side to the other keeping the jean flat & double the measurement.
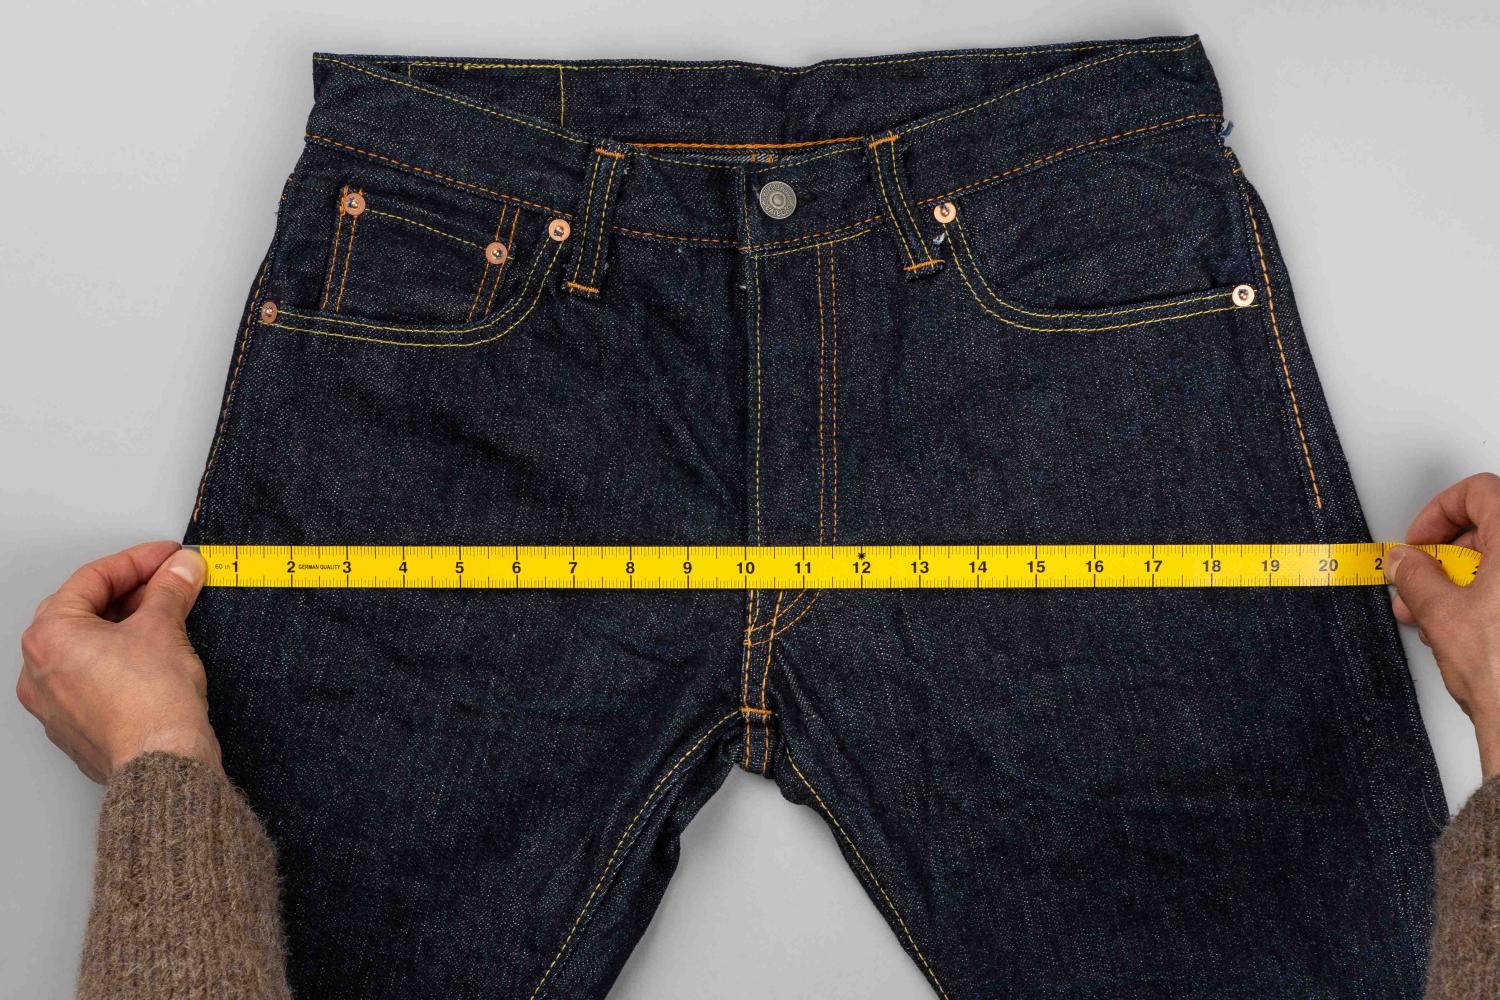
Stage 2: The hip
- Measure 3 inches or 7.5cm from the crotch stitch.
Measure from side to side flat across the jean at this point.

Stage 3: Front rise
- Lay flat and measure from crotch seam to top of jean with top button fastened

Stage 4: Back rise
- Measure from crotch seam to top of the back of the jean.

Stage 5: Thigh
- Lay flat and measure from crotch across to outside of leg.


Stage 6: Knee
- Lay flat and measure 13” or 33cm from crotch down inside seam of jeans
From here measure from one side of the jean to the other.
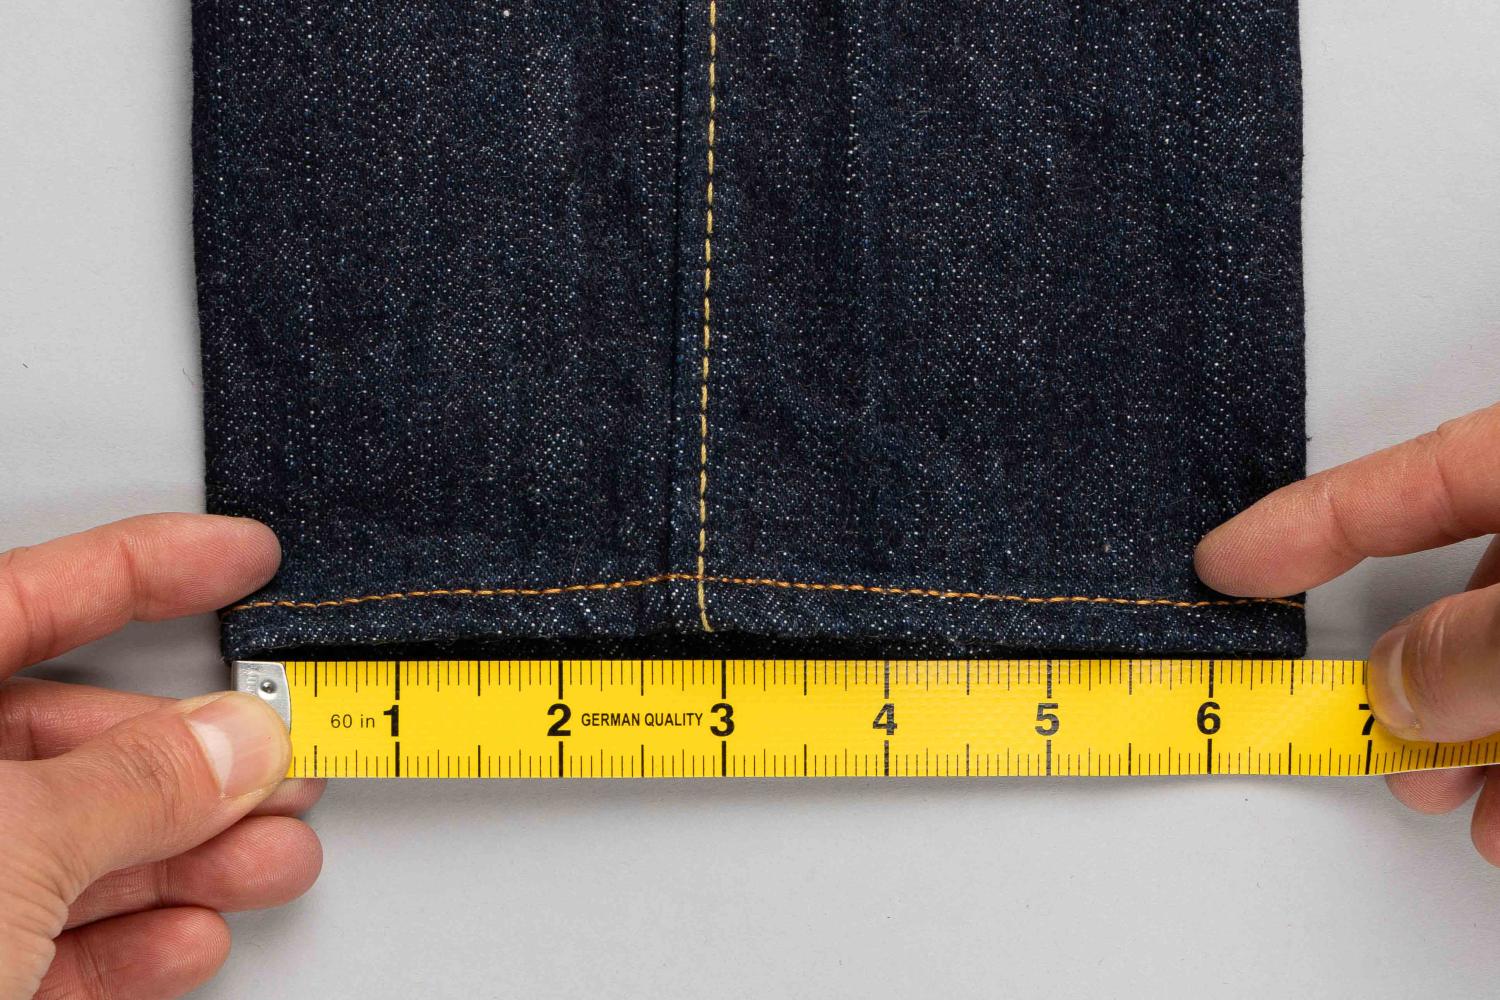
Stage 7: hem width/leg opening
- With the jean flat measure from one side of the leg opening to the other.
NB with very heavy denim 18oz and above measure the entire circumference of the exterior of the hem using a measuring tape and divide by 2 for a more exact figure.
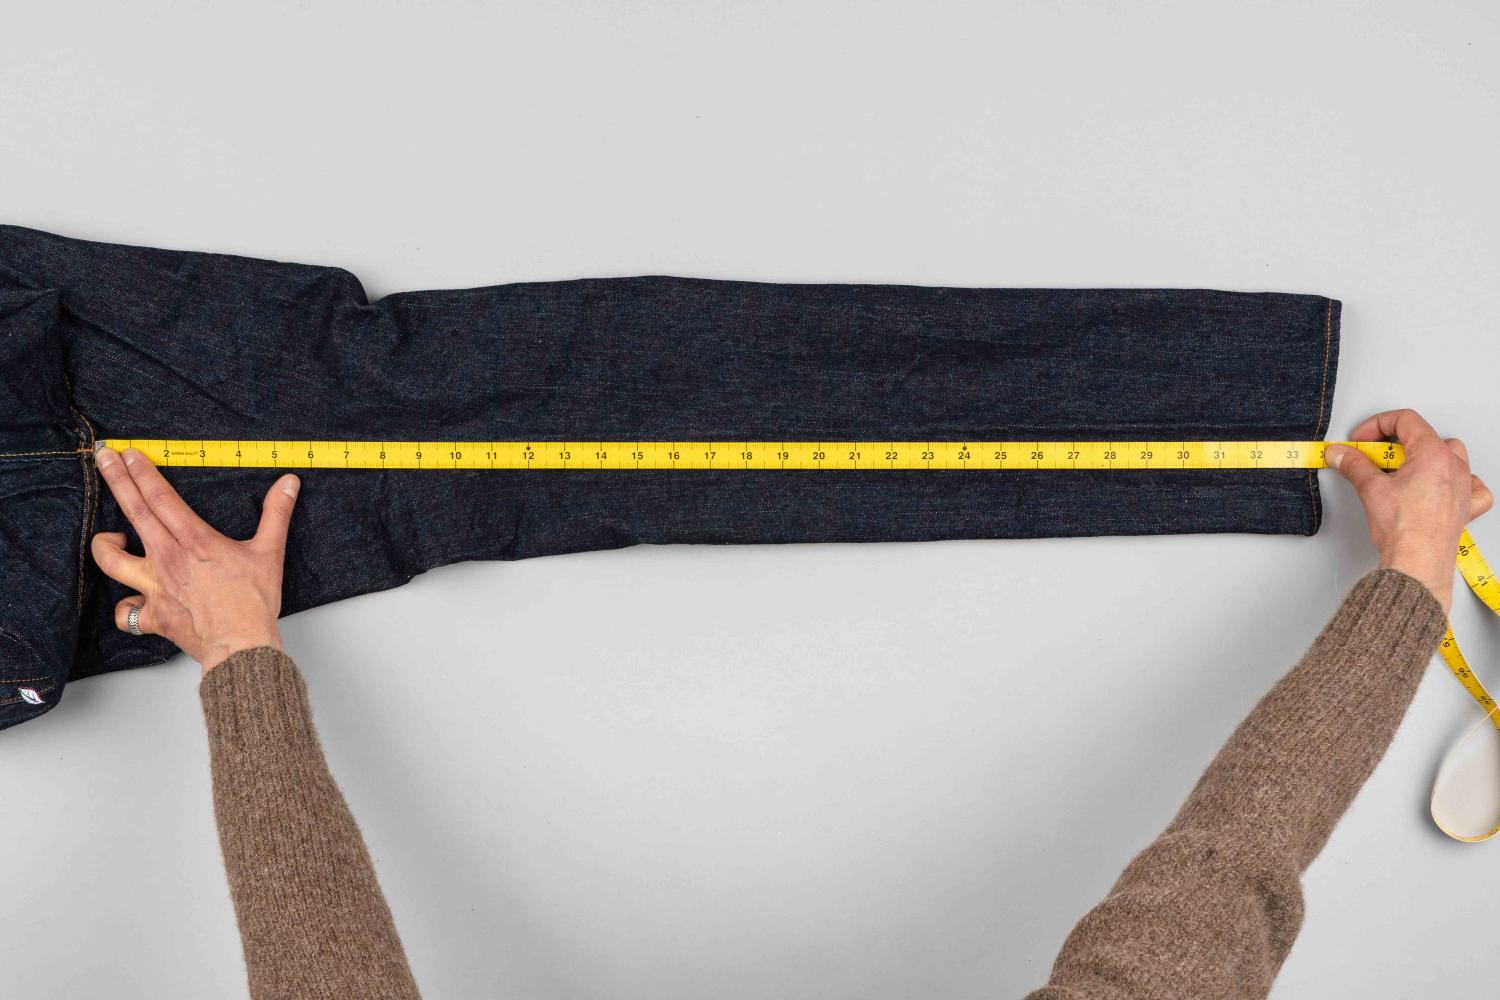
Stage 8: Inseam/inside leg
- Lay the jean flat with the inseam at the centre.
Following the inside seam measure from the crotch to the end of the leg.
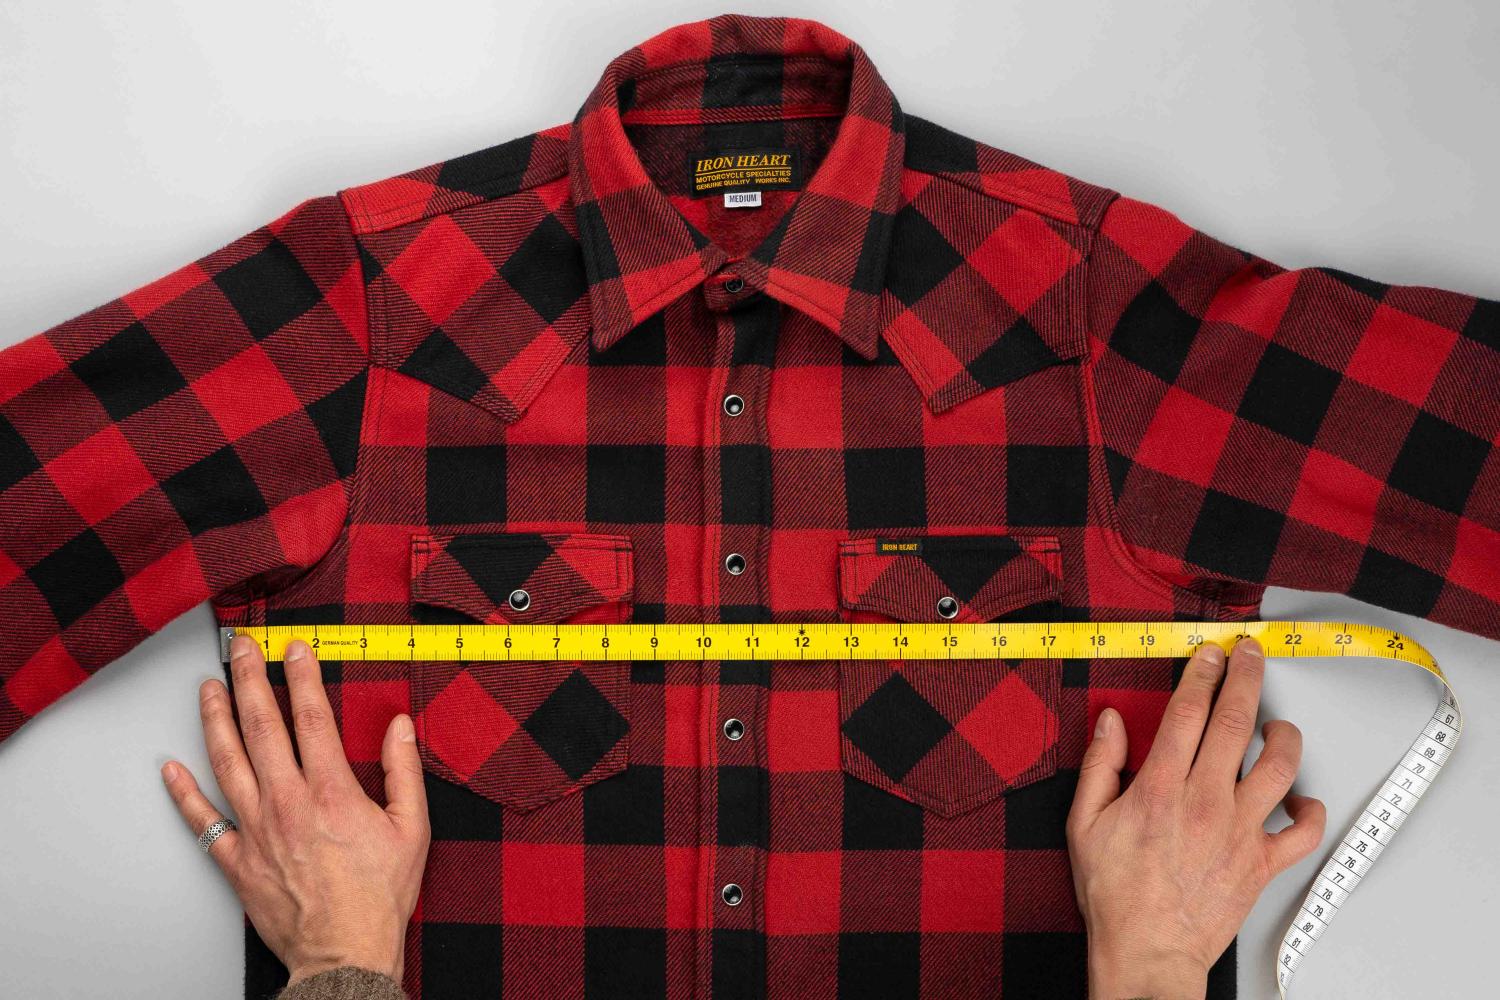
Stage 1: Chest
- Measure from pit to pit and double the reading.
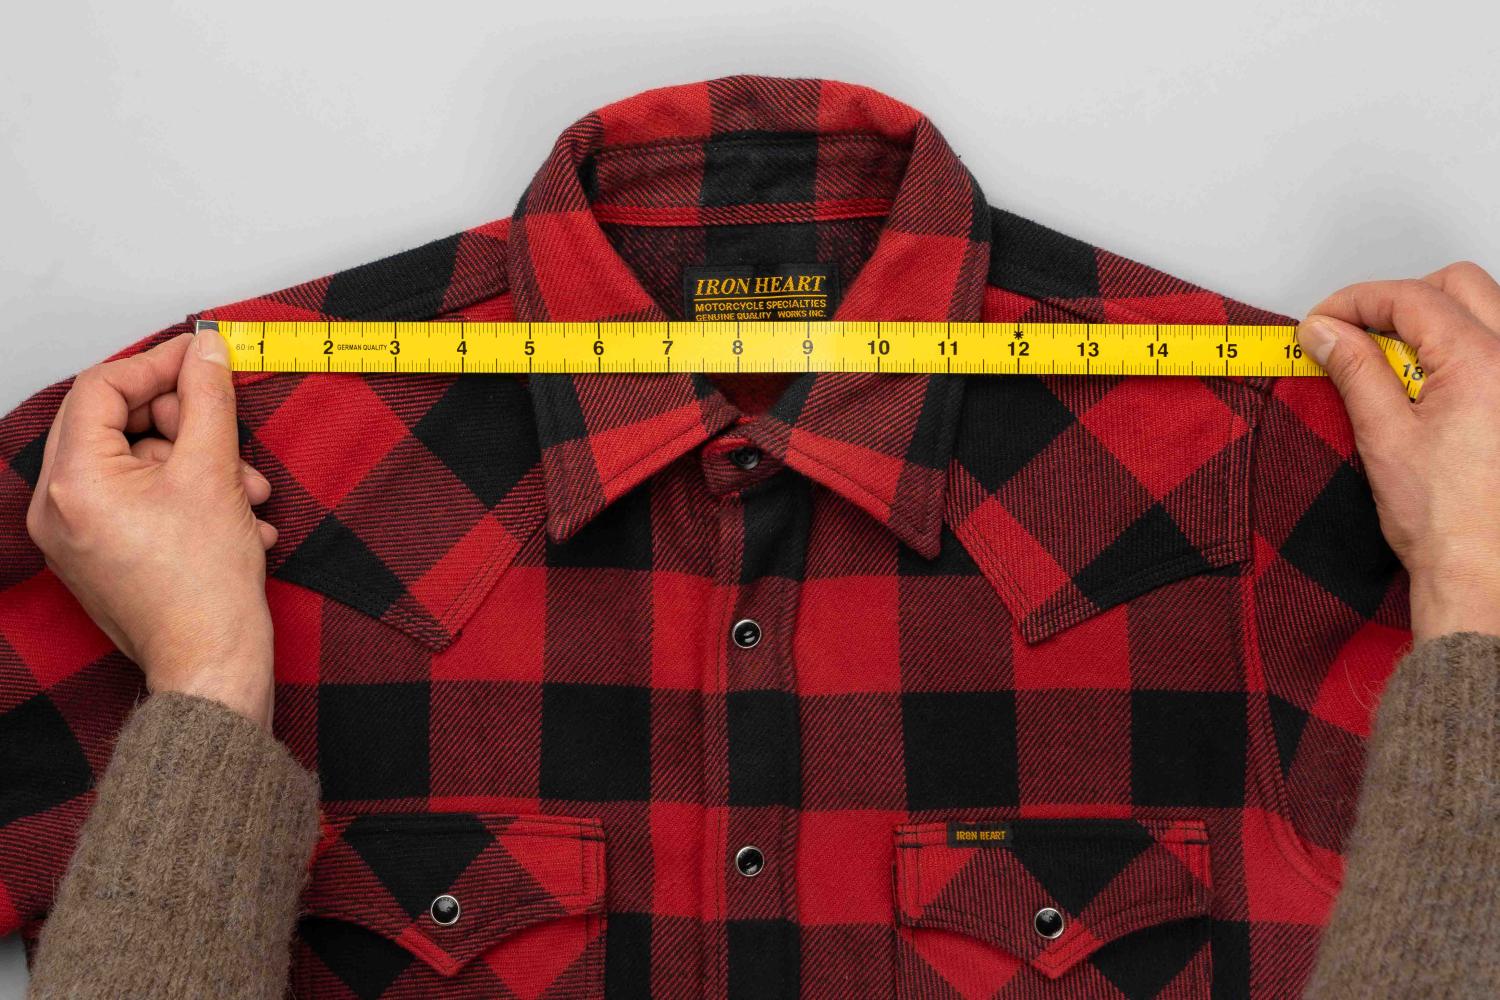
Stage 2: Shoulder
- Measure across the top from one shoulder seam to the other.
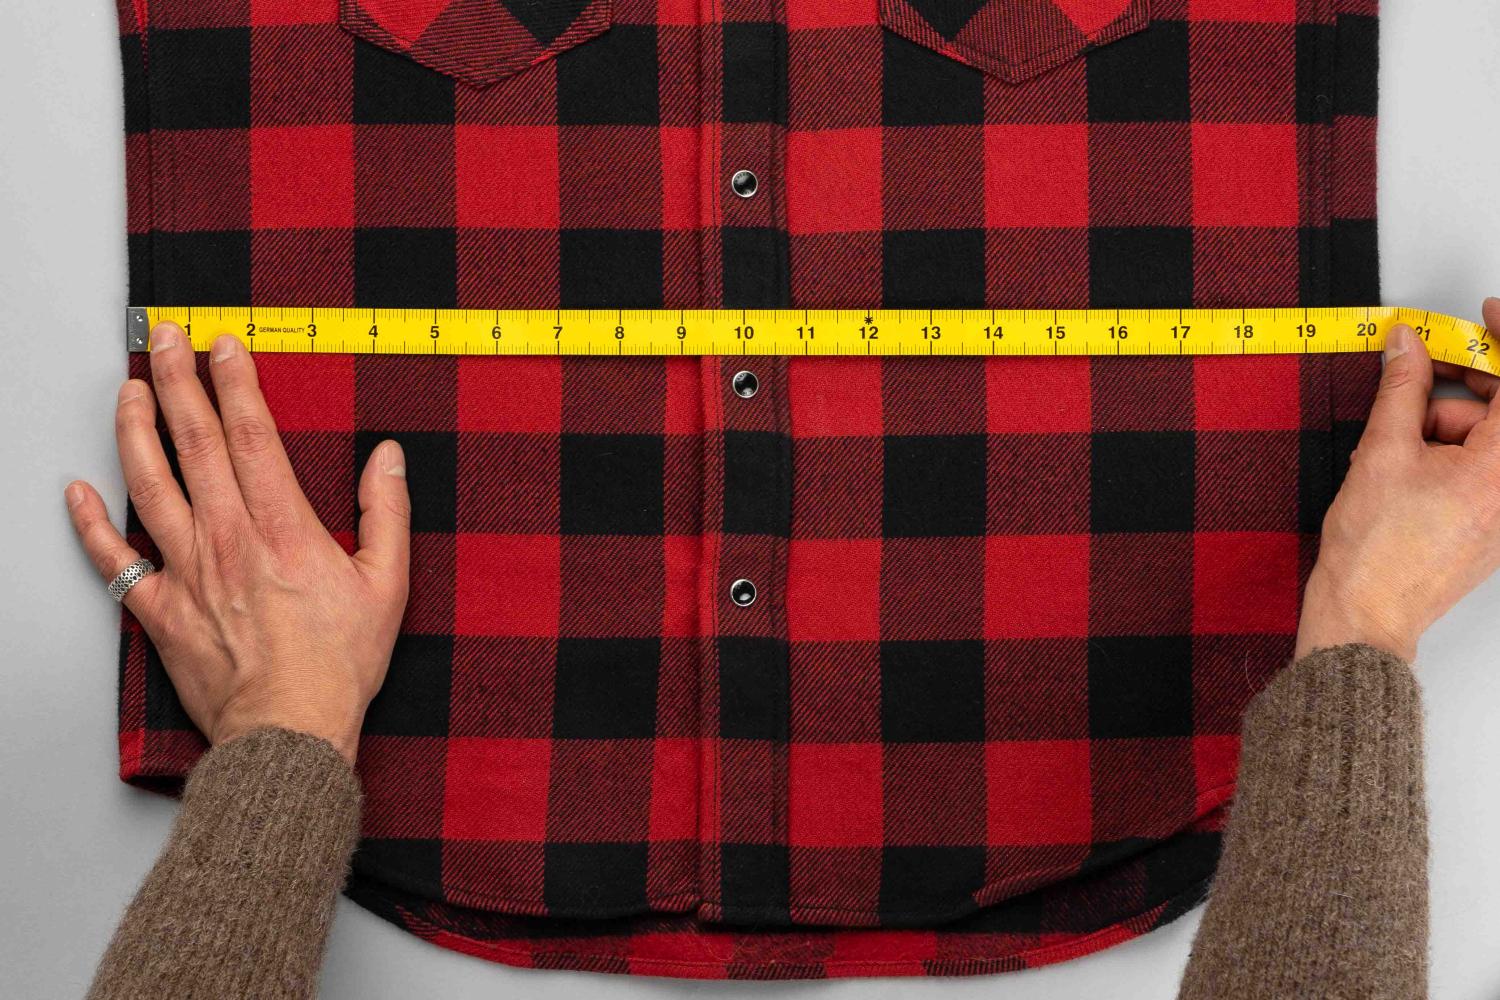
Stage 3: Waist
We measure the narrowest part of the garment outer seam to outer seam between the pit and the opening. If, however, the shirt has gussets, the waist will correspond to the the opening measurement.
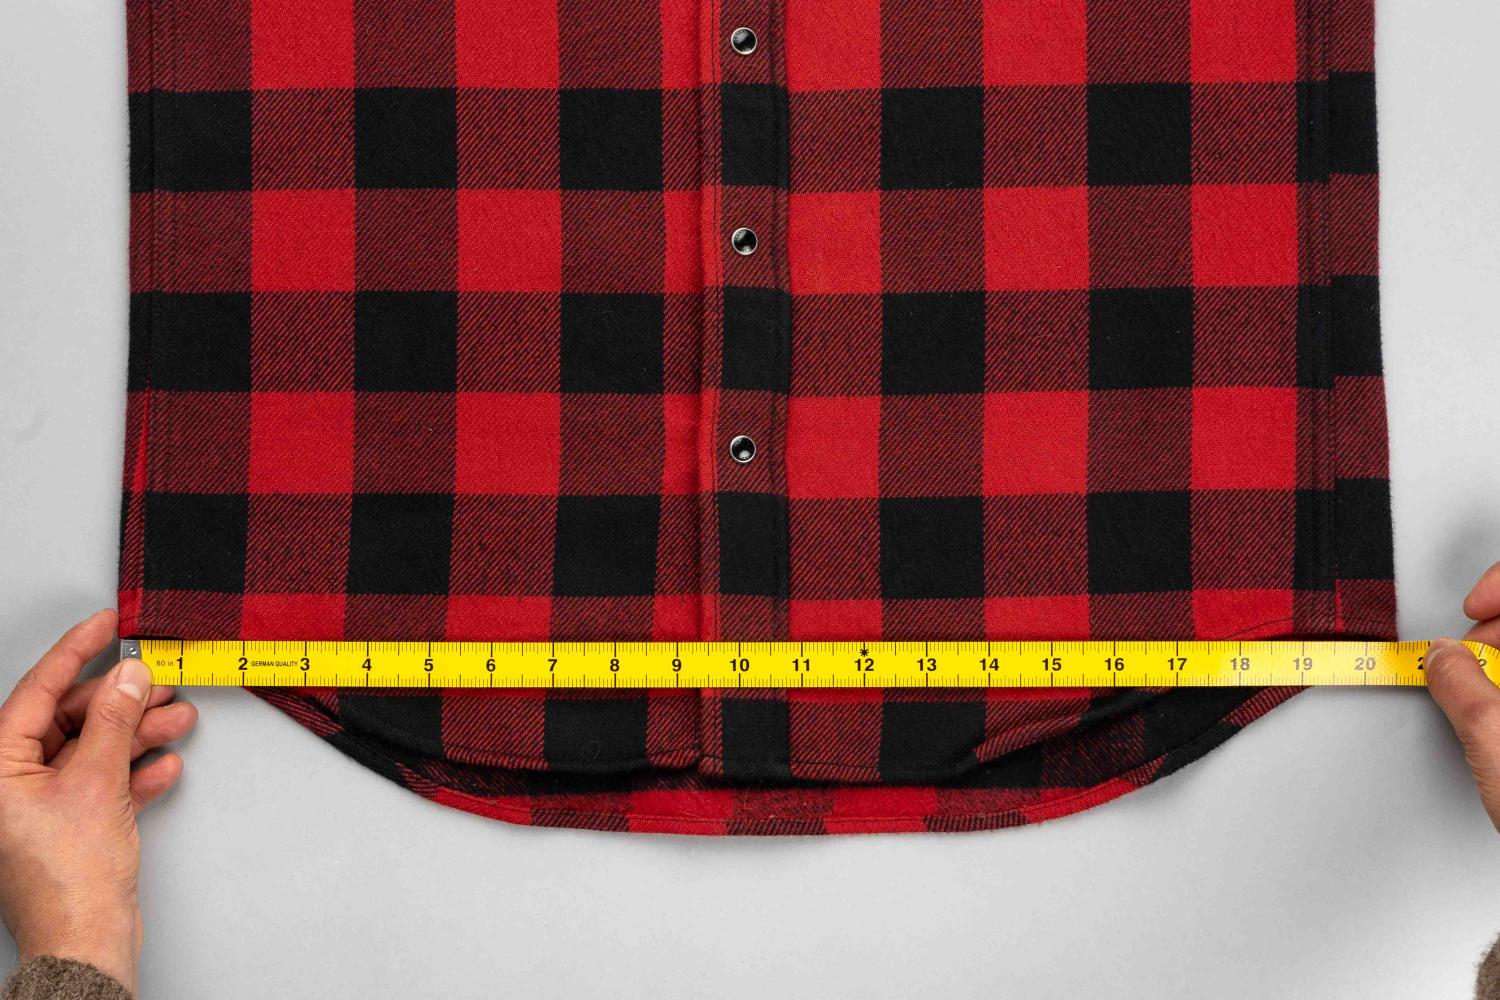
Stage 4: Opening
Here we take a cross measurement from seam to seam at the bottom of the shirt.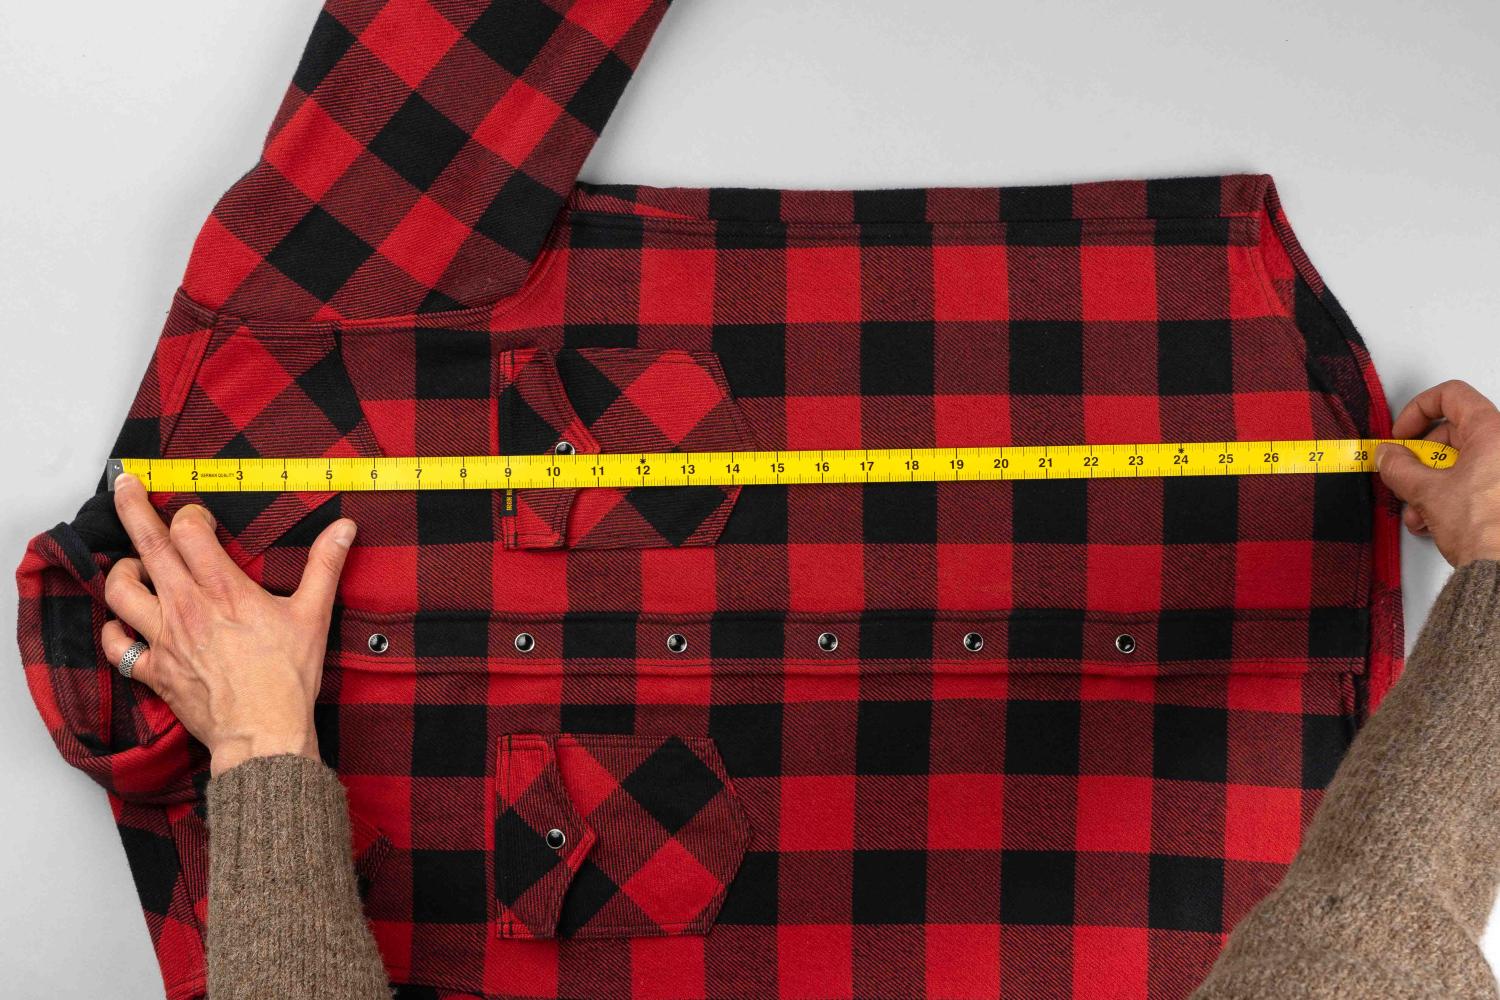
Stage 5: Length
Measure from the top of the shoulder by the collar to the bottom of the garment.
Stage 6: Sleeve
Measure from the top of shoulder seam to the cuff’s edge.
FREE UK delivery on orders over £50.
Shipping costs £8 to UK addresses for orders under £50.
For international orders, please see our full shipping and delivery details.
If you are not completely satisfied with your purchase, you can return it to us within 21 days for an exchange or refund.
For more information, please see our Returns & Exchanges page.