Rivet & Hide Bridle Leather Belt - Australian Nut Oak Bark
In stock
Rivet & Hide belts are made from high quality bridle leather sourced from Baker's tannery here in the UK. The site in Devon at Hamlyns, Coylton, has been a tannery since Roman times. Heritage leather doesn't come much better than this.
LEATHER: 5mm bridle leather
STYLE/FIT: Regular
COLOUR: Dark Brown/rich burgundy
METHOD: Oak bark bridle tanned
DETAILS:
-Australian Nut oak bark tanned
-Hand-dyed
-Sand-cast Nickel plated full buckle
-Solid brass rivets and tough braided thread
-1.5”/3.75cm wide
-Made by Tanner Bates in Devon
ORIGIN: Made in Devon, UK
Small: Jeans sizes 28-32 (38" / 97cm length)
Medium: Jeans sizes 32-36 (43" / 109cm length)
Large: Jean sizes 36-40 (47" / 119cm length)
Hamlyn's is Britain’s last remaining oak bark tannery. The slow method of tanning has changed little since the Roman era in the UK. The hides, still raw, are soaked in lime where their pores open and the hairs loosen. Over a period of three months the hides are moved by hand into progressively stronger tanning liquors. The liquors come from soaking oak bark in Devon water to extract the tannins. The sunshine filters into the tanning rooms and the hides are left to hang in the West Country air.
The butt is the thickest part of the skin with the tightest fibres. Bridle butt leather refers to the way the leather is finished at the tannery. Both the flesh and grain sides are wax finished. This takes time and is labour intensive and only the best leather gets this treatment due to the costs involved. The flesh side is waxed as it sits on the horse's skin. The leather is strong and extremely durable.
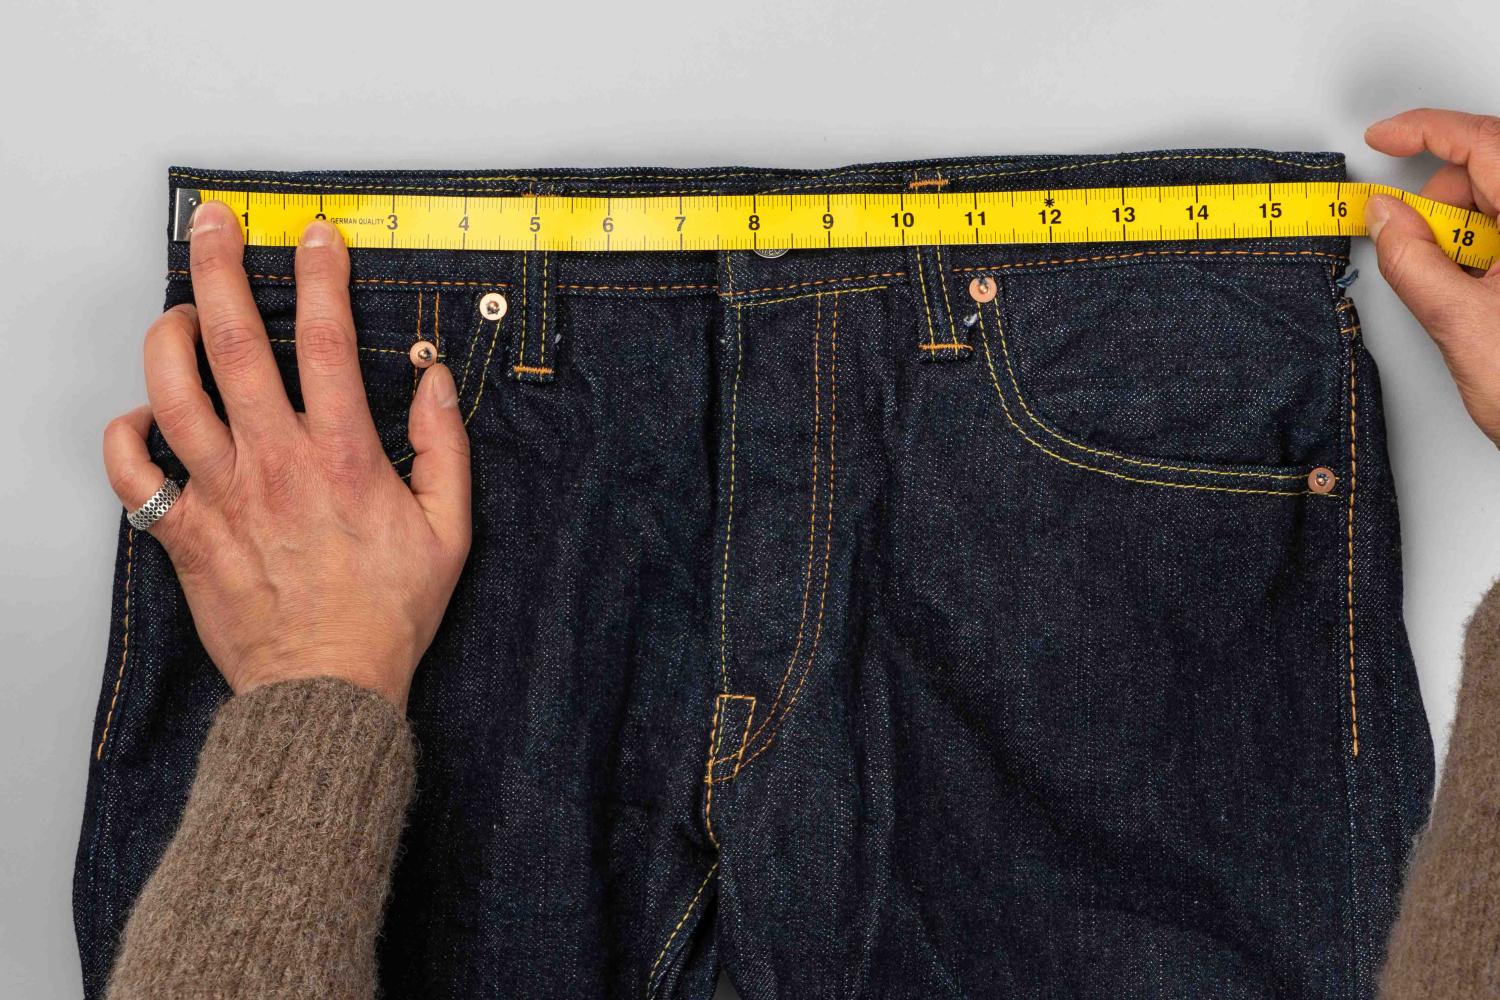
Stage 1: The waist
- Button up the jean.
Lay flat with the top waist band evenly flat on the back waist band.
Measure from one side to the other keeping the jean flat & double the measurement.
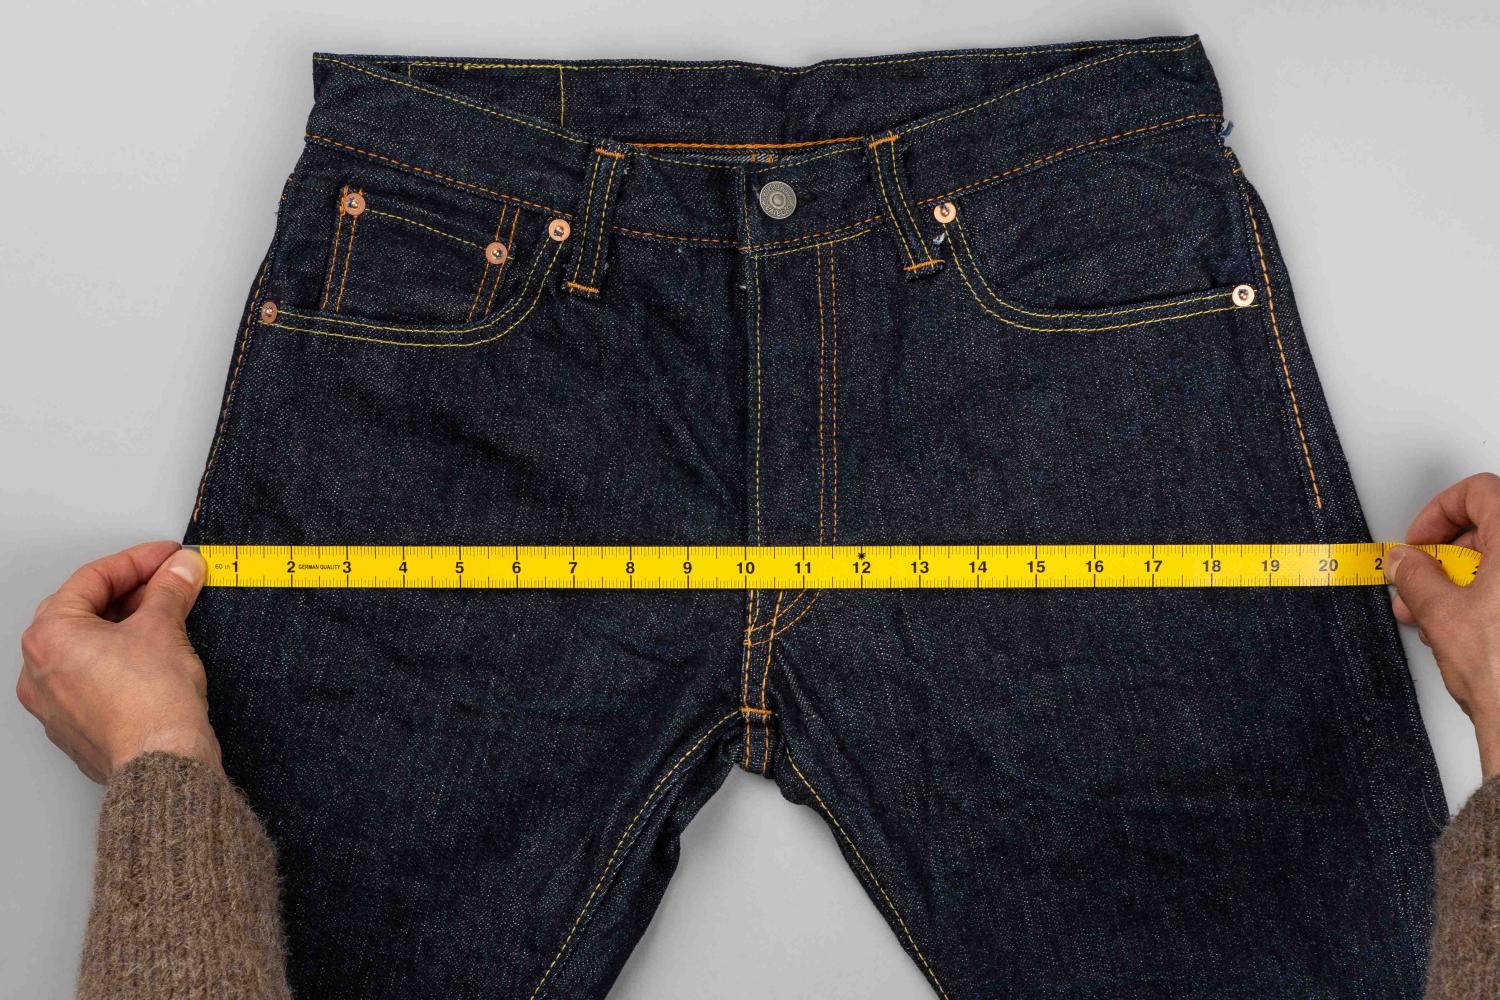
Stage 2: The hip
- Measure 3 inches or 7.5cm from the crotch stitch.
Measure from side to side flat across the jean at this point.

Stage 3: Front rise
- Lay flat and measure from crotch seam to top of jean with top button fastened

Stage 4: Back rise
- Measure from crotch seam to top of the back of the jean.

Stage 5: Thigh
- Lay flat and measure from crotch across to outside of leg.


Stage 6: Knee
- Lay flat and measure 13” or 33cm from crotch down inside seam of jeans
From here measure from one side of the jean to the other.
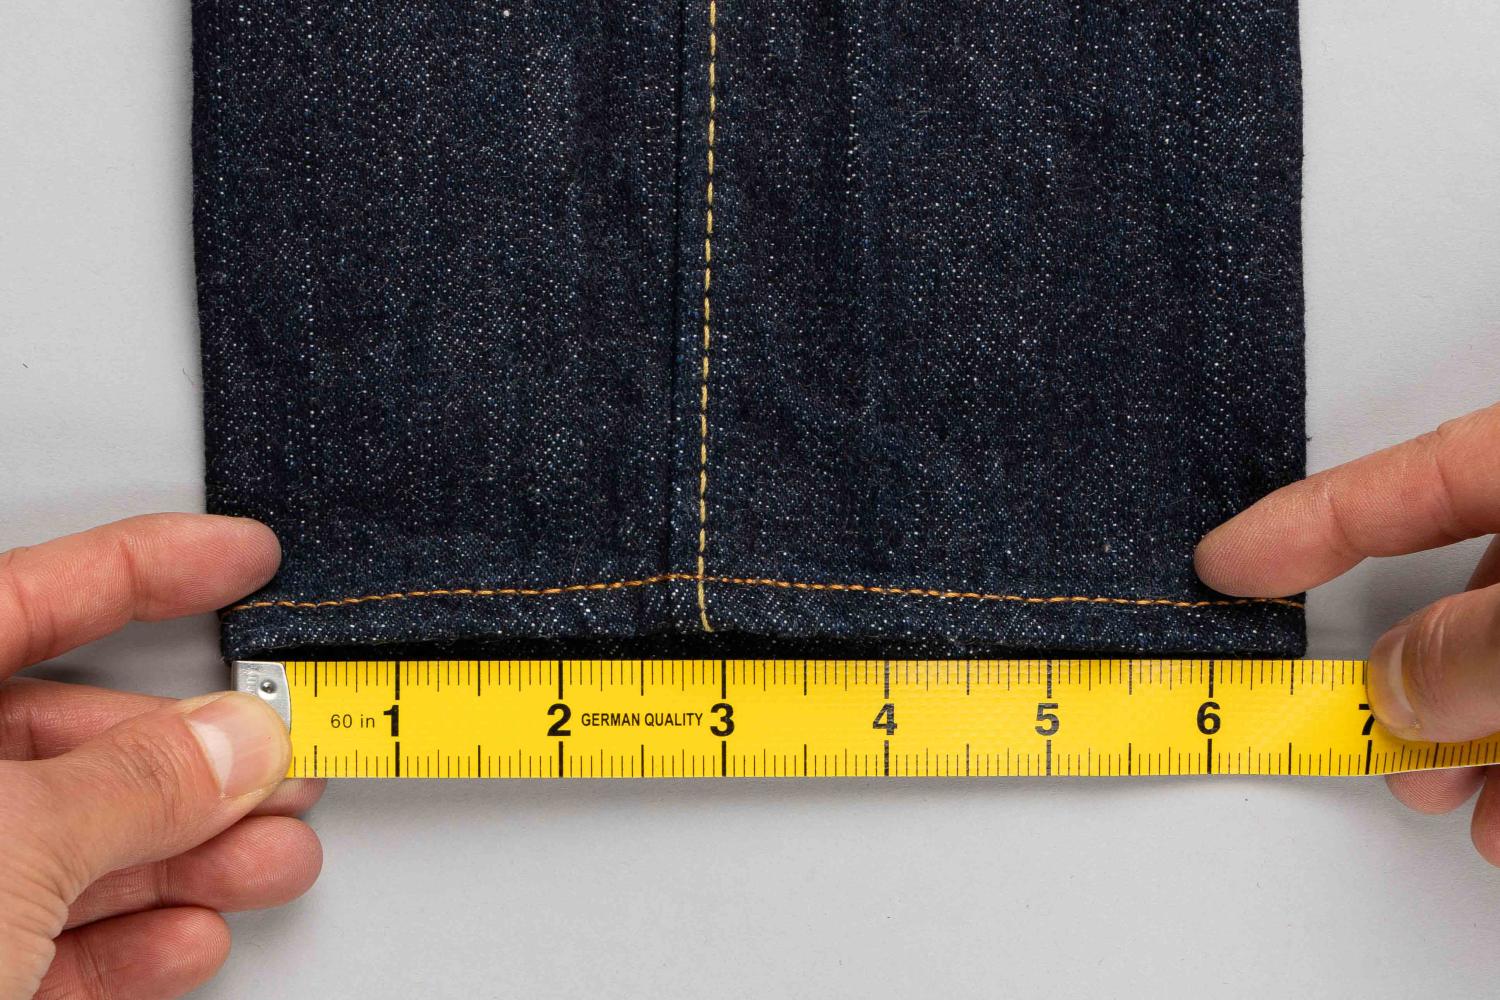
Stage 7: hem width/leg opening
- With the jean flat measure from one side of the leg opening to the other.
NB with very heavy denim 18oz and above measure the entire circumference of the exterior of the hem using a measuring tape and divide by 2 for a more exact figure.
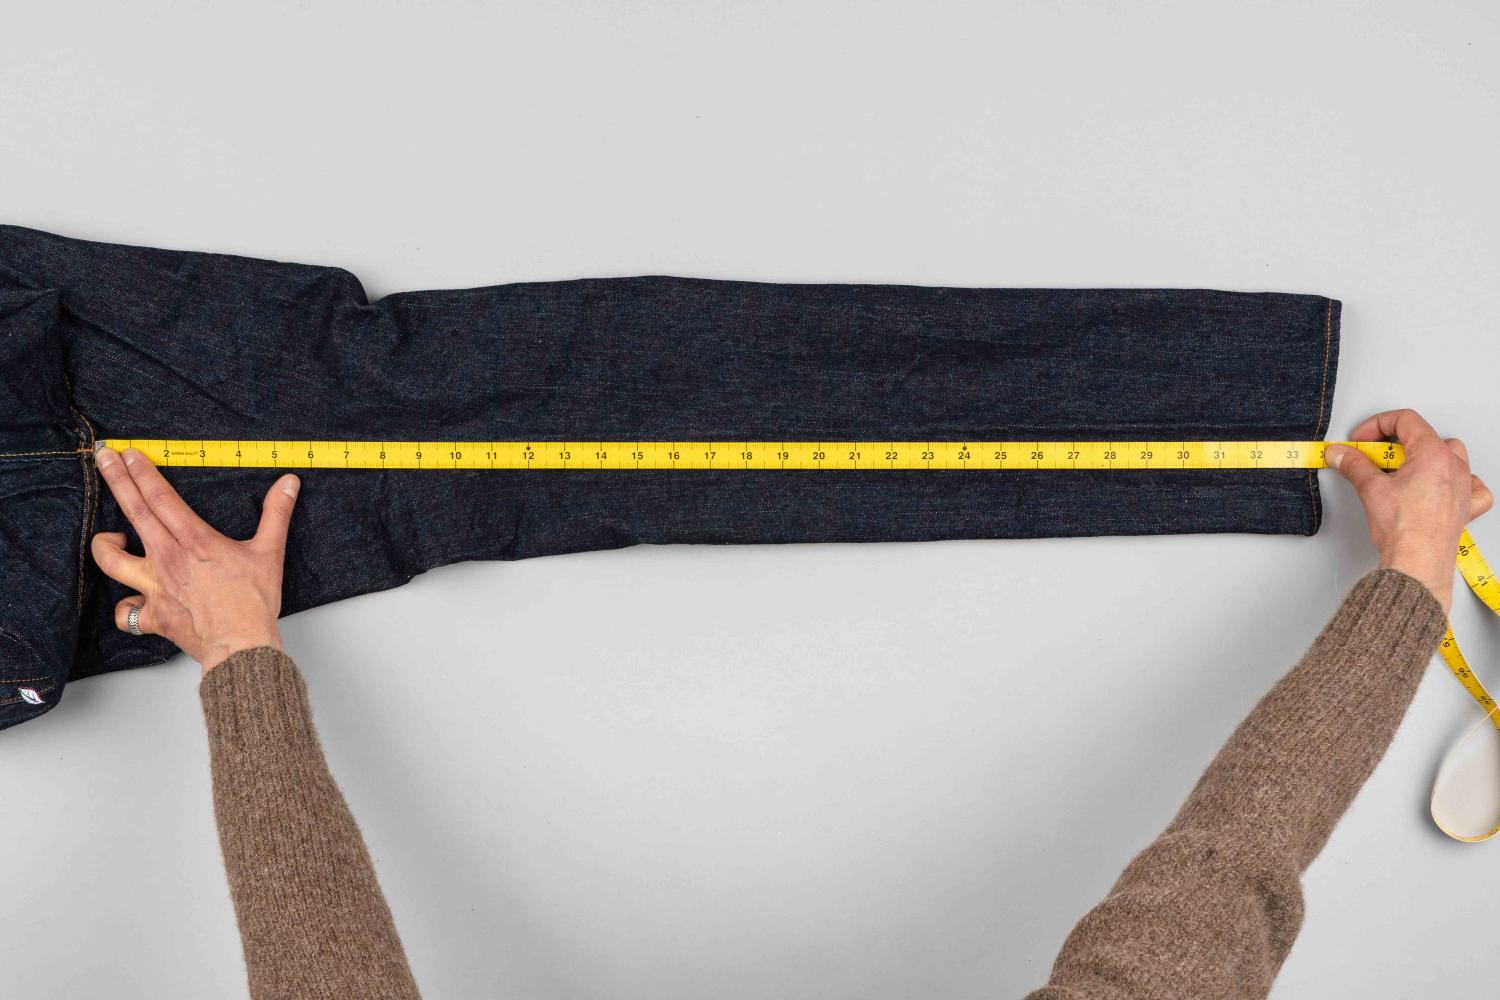
Stage 8: Inseam/inside leg
- Lay the jean flat with the inseam at the centre.
Following the inside seam measure from the crotch to the end of the leg.
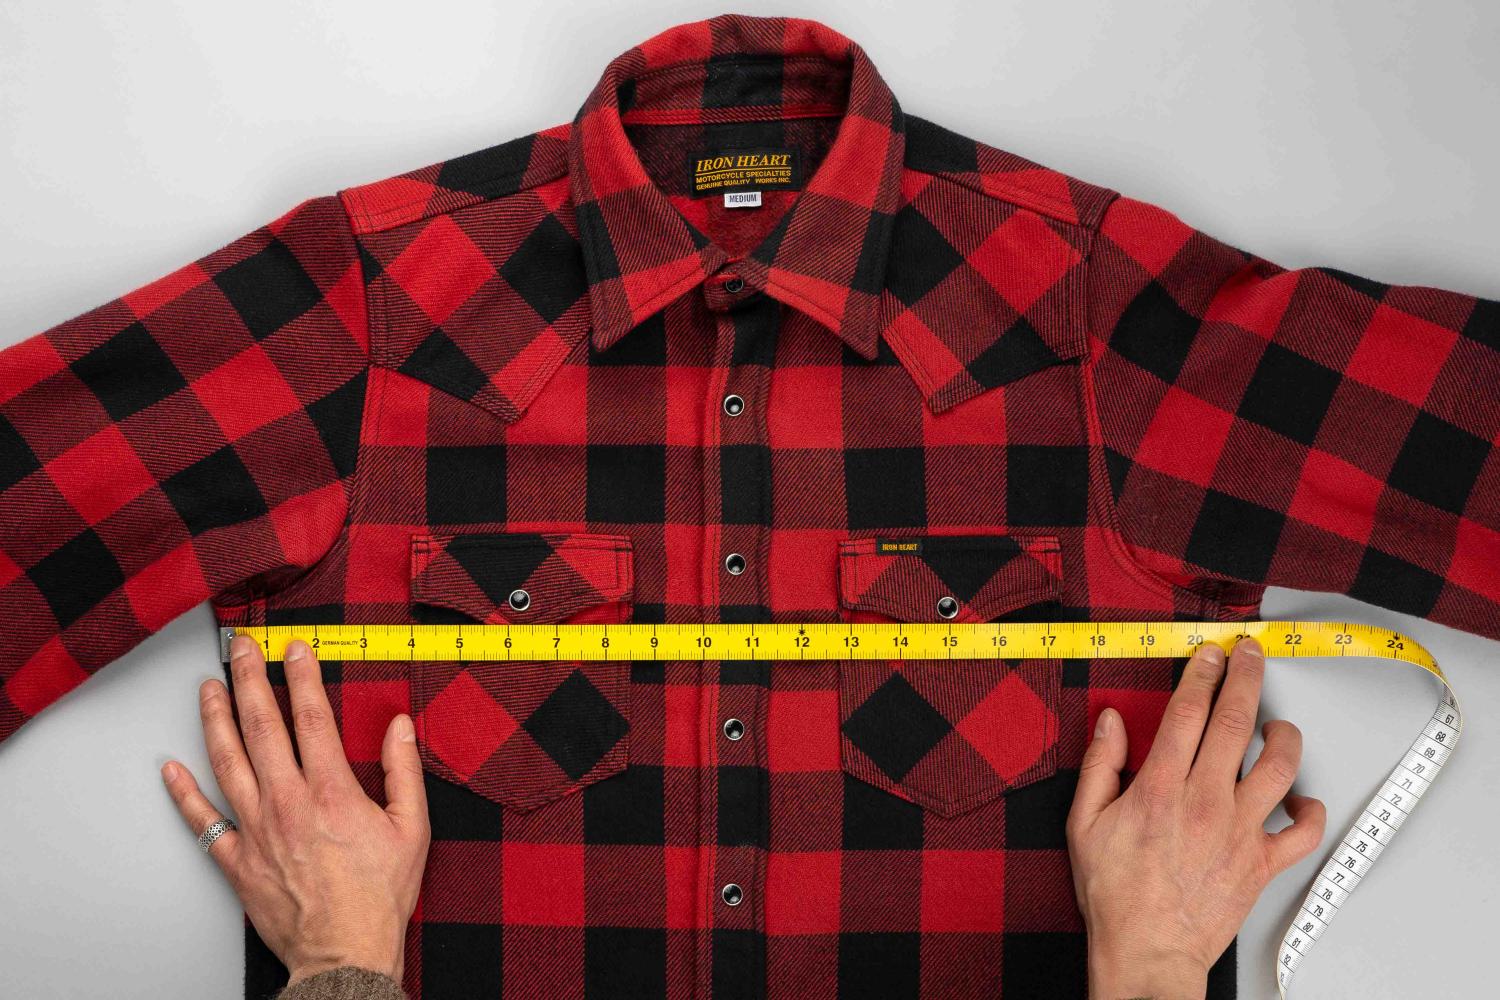
Stage 1: Chest
- Measure from pit to pit and double the reading.
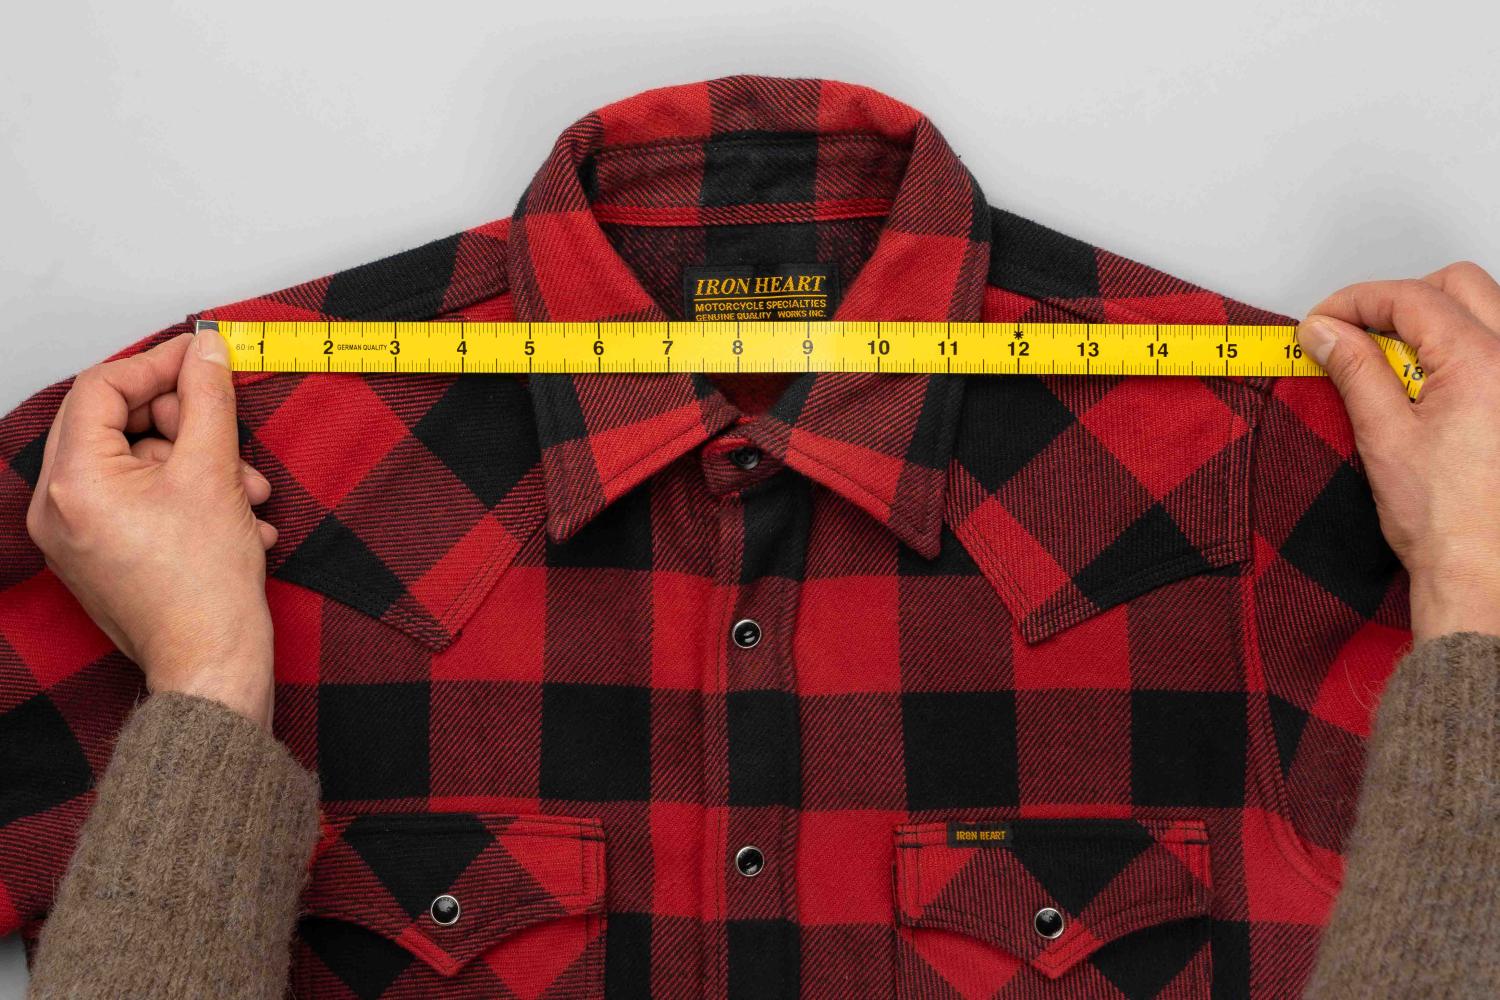
Stage 2: Shoulder
- Measure across the top from one shoulder seam to the other.
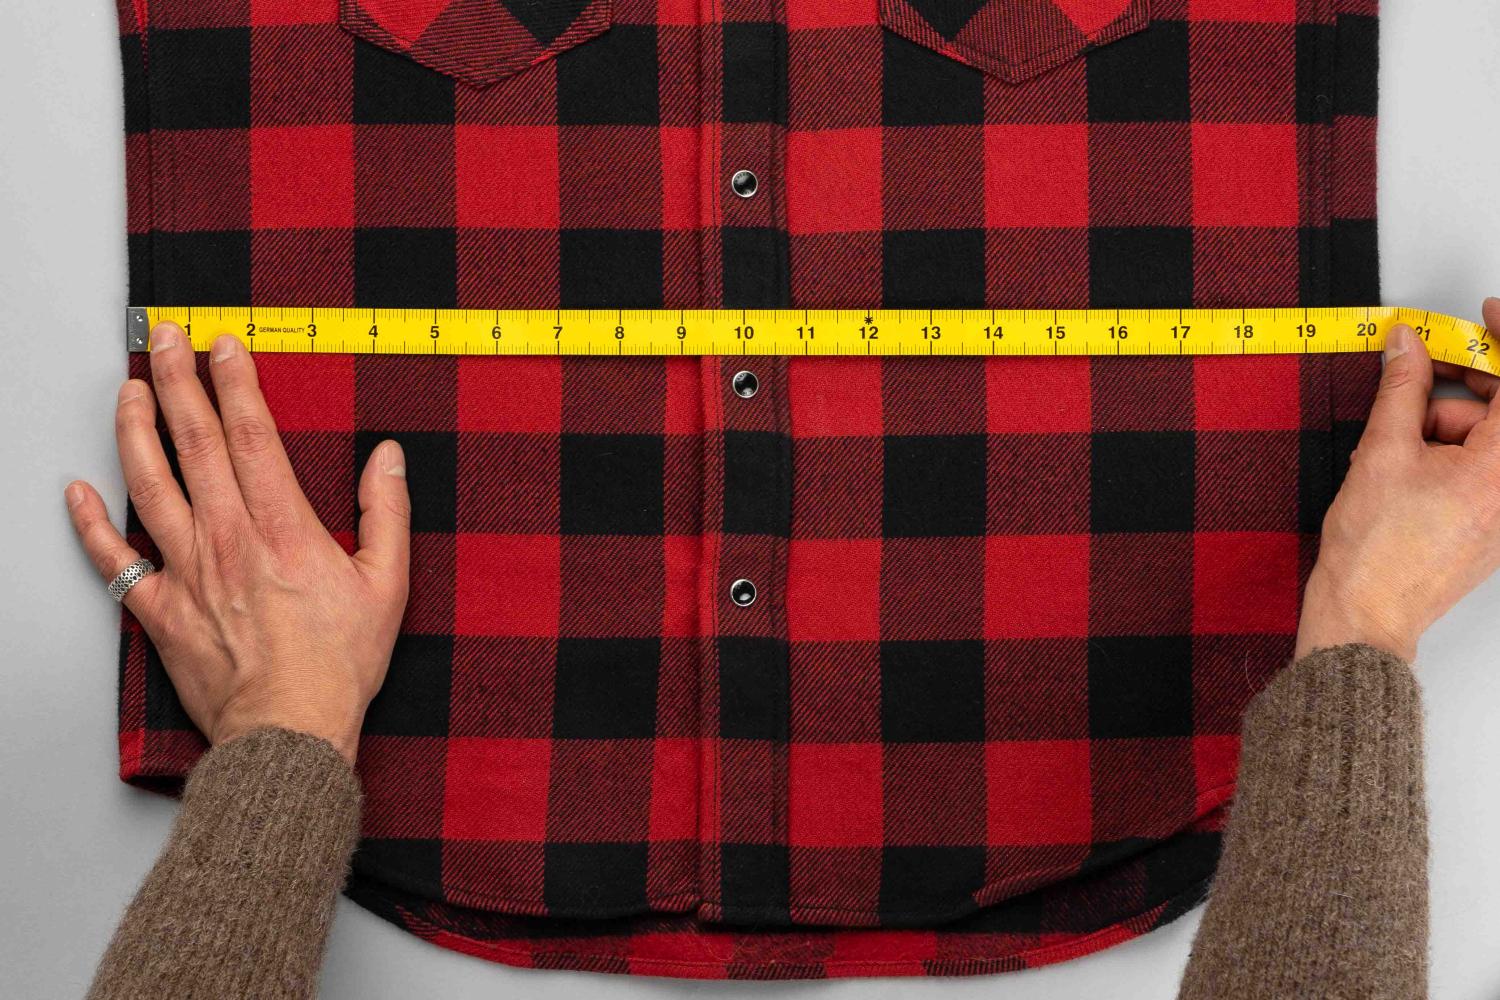
Stage 3: Waist
We measure the narrowest part of the garment outer seam to outer seam between the pit and the opening. If, however, the shirt has gussets, the waist will correspond to the the opening measurement.
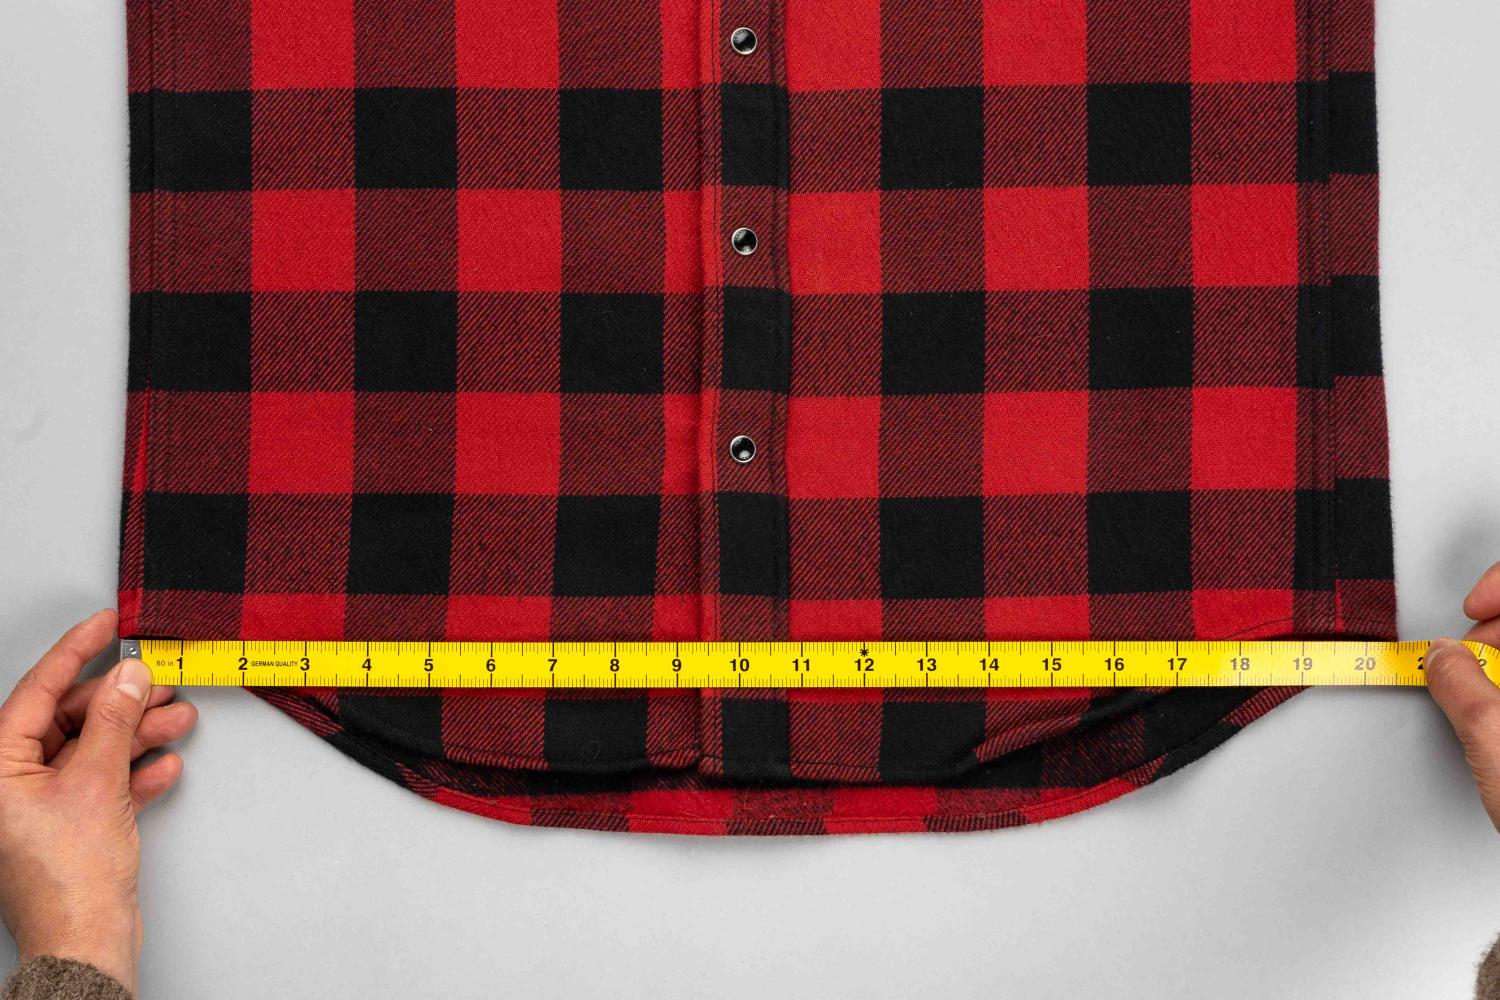
Stage 4: Opening
Here we take a cross measurement from seam to seam at the bottom of the shirt.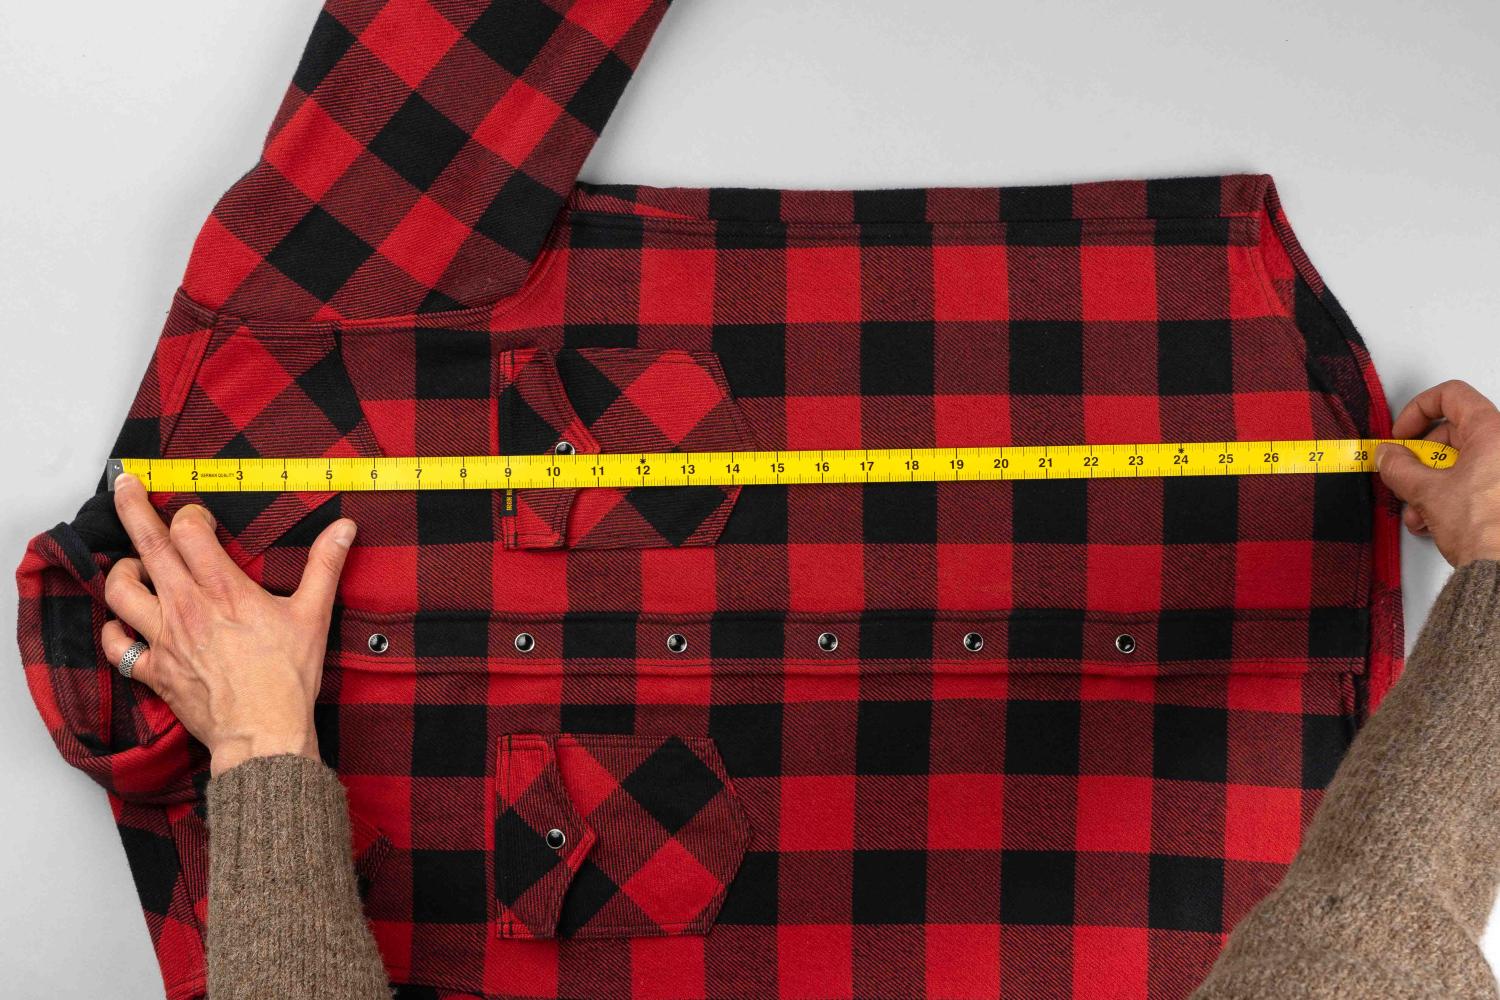
Stage 5: Length
Measure from the top of the shoulder by the collar to the bottom of the garment.
Stage 6: Sleeve
Measure from the top of shoulder seam to the cuff’s edge.
FREE UK delivery on orders over £50.
Shipping costs £8 to UK addresses for orders under £50.
For international orders, please see our full shipping and delivery details.
If you are not completely satisfied with your purchase, you can return it to us within 21 days for an exchange or refund.
For more information, please see our Returns & Exchanges page.