Good Art Sterling Silver B&T Bracelet - AA
In stock
Good Art’s ‘Box & Tongue’ bracelet sees Good Art doing what they do best; creating stand-out pieces with a touch of old-school craftsmanship.
METAL: .925 sterling silver
DETAILS:
-Cast, hand-finished, and filed at Good Art's LA foundry
-Good Art original design
-Hand-sprung tongue
-Low profile links
-Also available in 18k and 22k gold
ORIGIN: Made in USA
Sizing (width of bracelet):
A = 15mm
All sizes have a clasp length of 25mm.
The links of the B&T bracelet offer a lower profile variant of our Model 10 curb links. But the real talking point here lies in the bracelet’s classic mechanism. Crafted and perfected by hand, the tongue mechanism is folded and hand-sprung. The bracelet is opened by pressing firmly on the trigger and sliding the links out with your thumb. It’s a clever and elegant design with a hint of playfulness.
For other sizes or 22K yellow gold inquires please email [email protected]
All jewellery is made in-house at Good Art’s LA foundry. Precious stones can also be incorporated into any customization. We carry an extensive range of Good Art jewellery across both of our stores. Come and visit us to see the collection up close and personal. Custom orders can be easily arranged.
NB: When sizing, measure your wrist with a soft measuring tape down low and snug, not tight. That will provide the most accurate sizing. If you're in-between whole sizes, pick the next bracelet size up. Resist the temptation to measure other bracelets and compare your wrist circumference suffice.
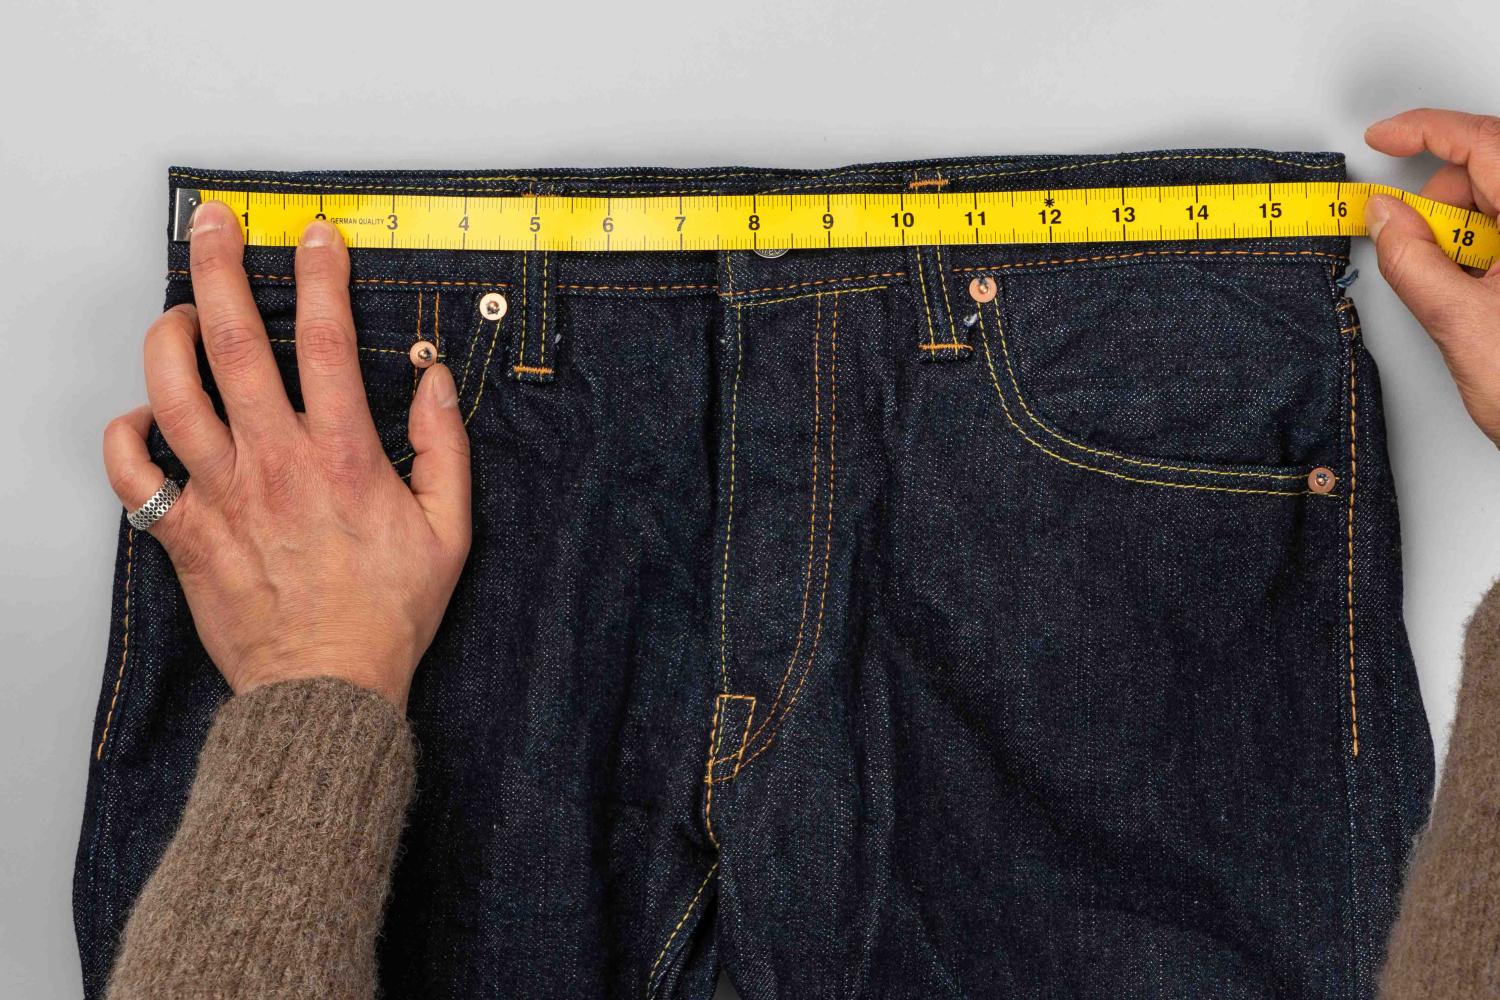
Stage 1: The waist
- Button up the jean.
Lay flat with the top waist band evenly flat on the back waist band.
Measure from one side to the other keeping the jean flat & double the measurement.
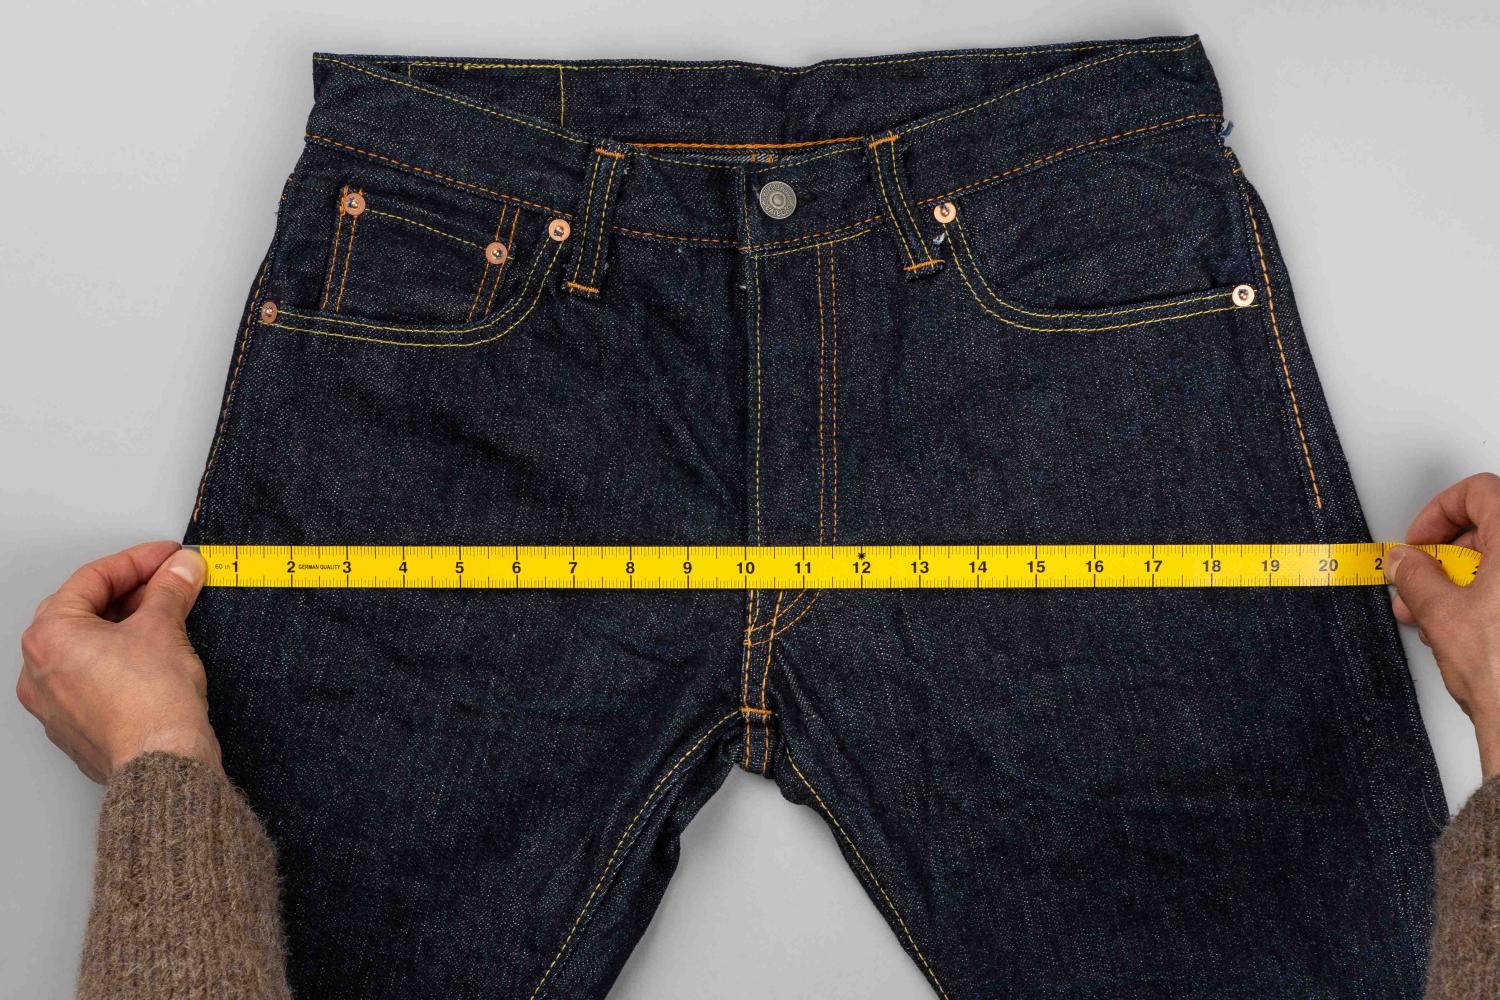
Stage 2: The hip
- Measure 3 inches or 7.5cm from the crotch stitch.
Measure from side to side flat across the jean at this point.

Stage 3: Front rise
- Lay flat and measure from crotch seam to top of jean with top button fastened

Stage 4: Back rise
- Measure from crotch seam to top of the back of the jean.

Stage 5: Thigh
- Lay flat and measure from crotch across to outside of leg.


Stage 6: Knee
- Lay flat and measure 13” or 33cm from crotch down inside seam of jeans
From here measure from one side of the jean to the other.
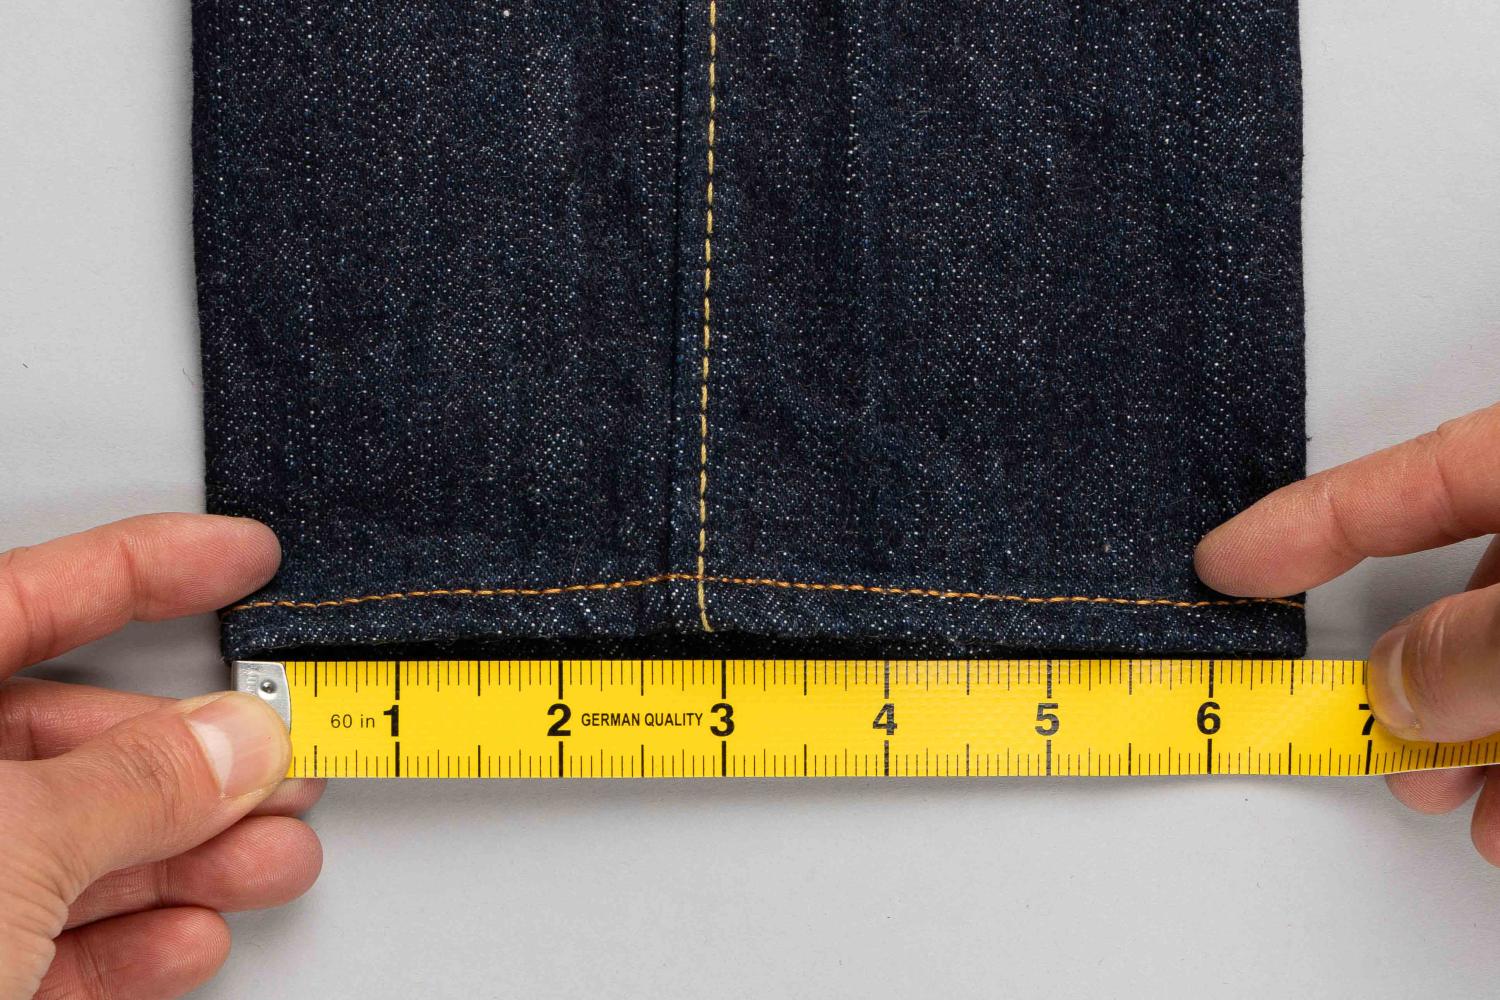
Stage 7: hem width/leg opening
- With the jean flat measure from one side of the leg opening to the other.
NB with very heavy denim 18oz and above measure the entire circumference of the exterior of the hem using a measuring tape and divide by 2 for a more exact figure.
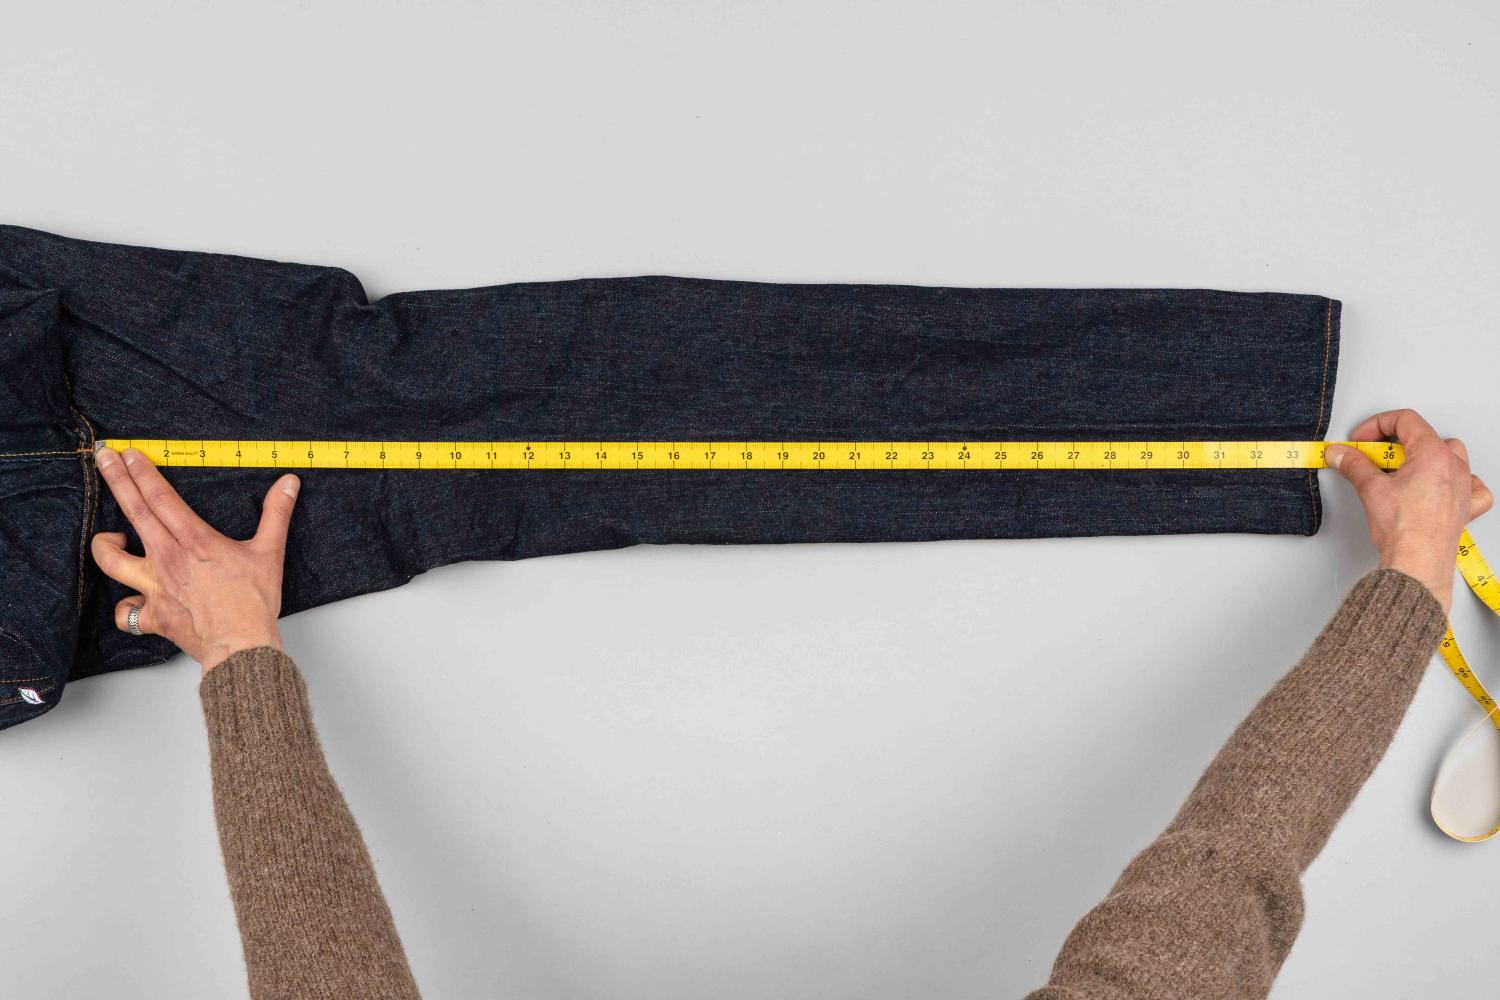
Stage 8: Inseam/inside leg
- Lay the jean flat with the inseam at the centre.
Following the inside seam measure from the crotch to the end of the leg.
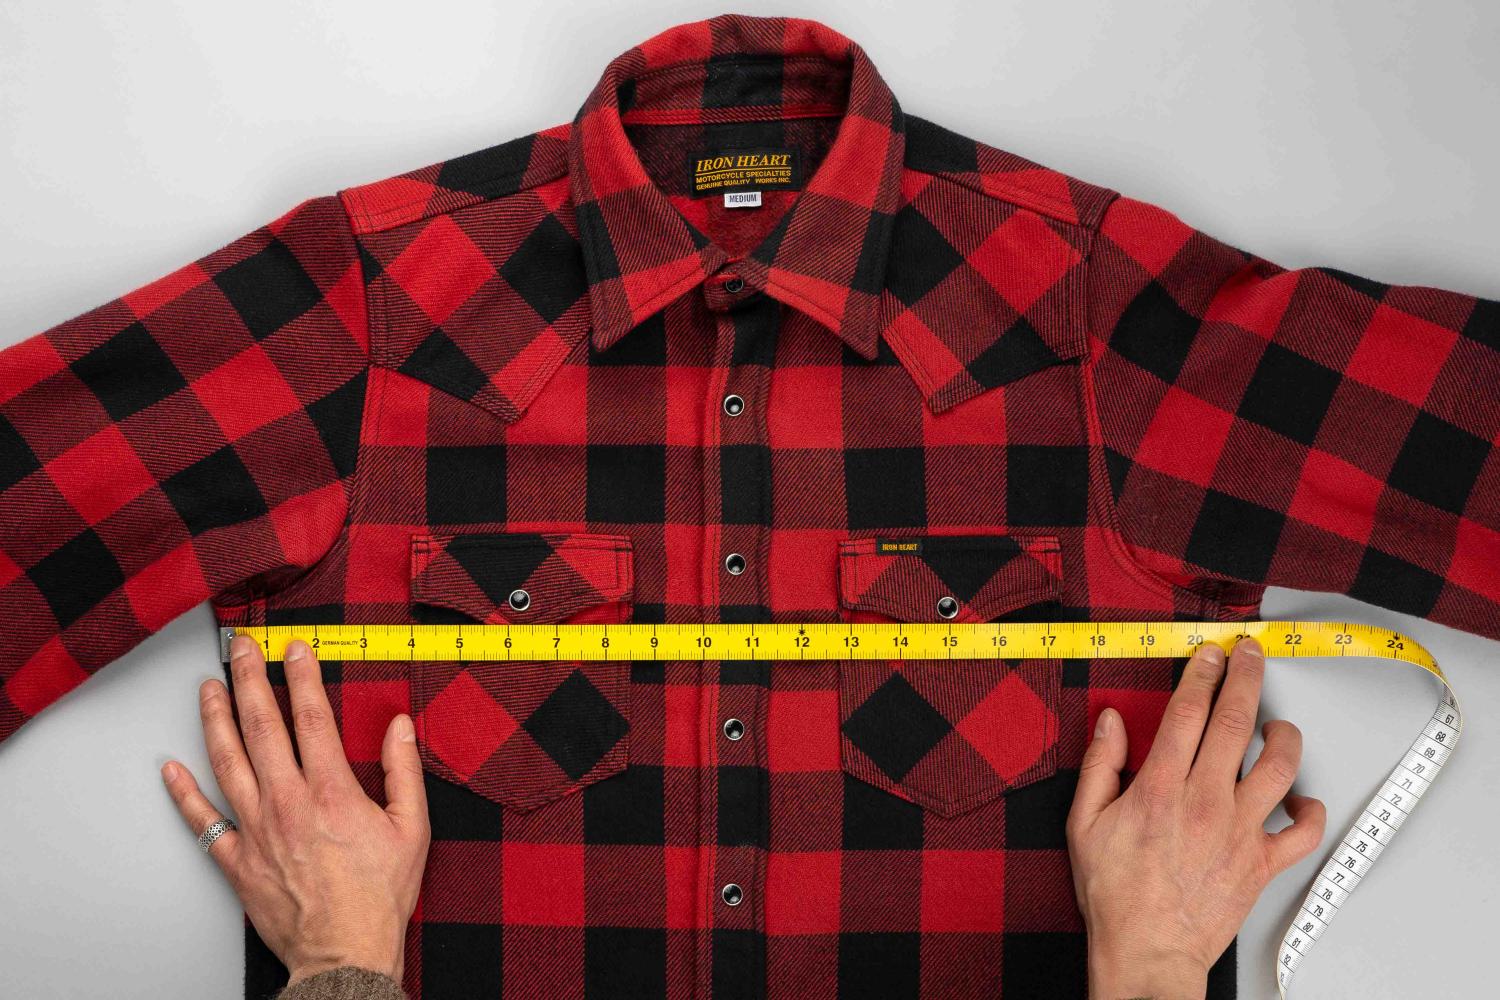
Stage 1: Chest
- Measure from pit to pit and double the reading.
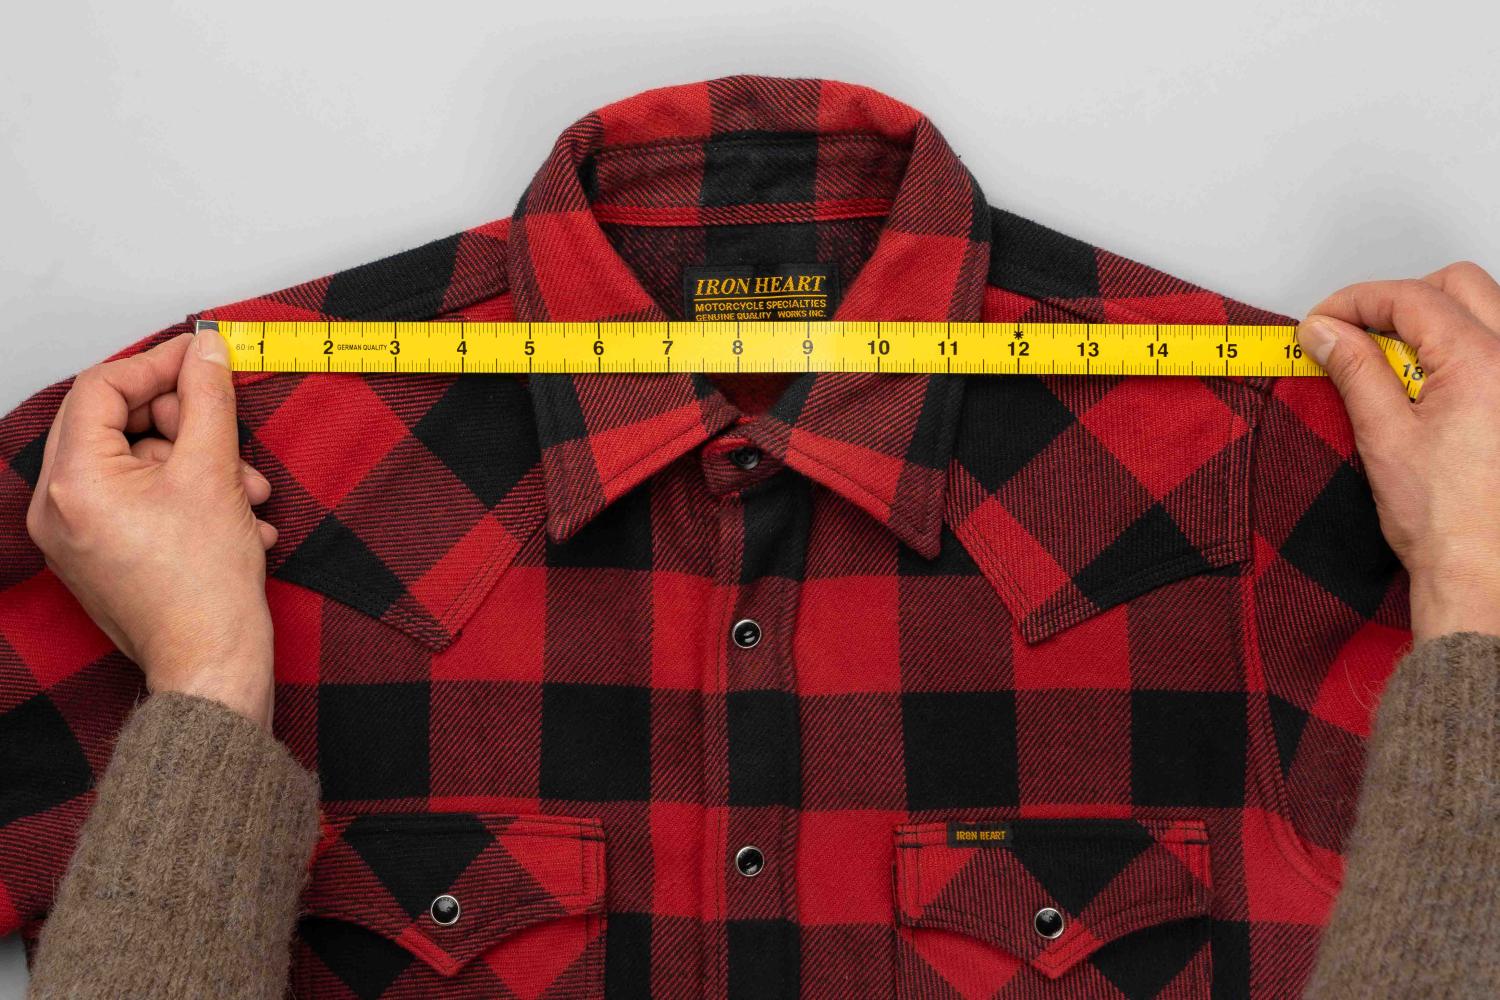
Stage 2: Shoulder
- Measure across the top from one shoulder seam to the other.
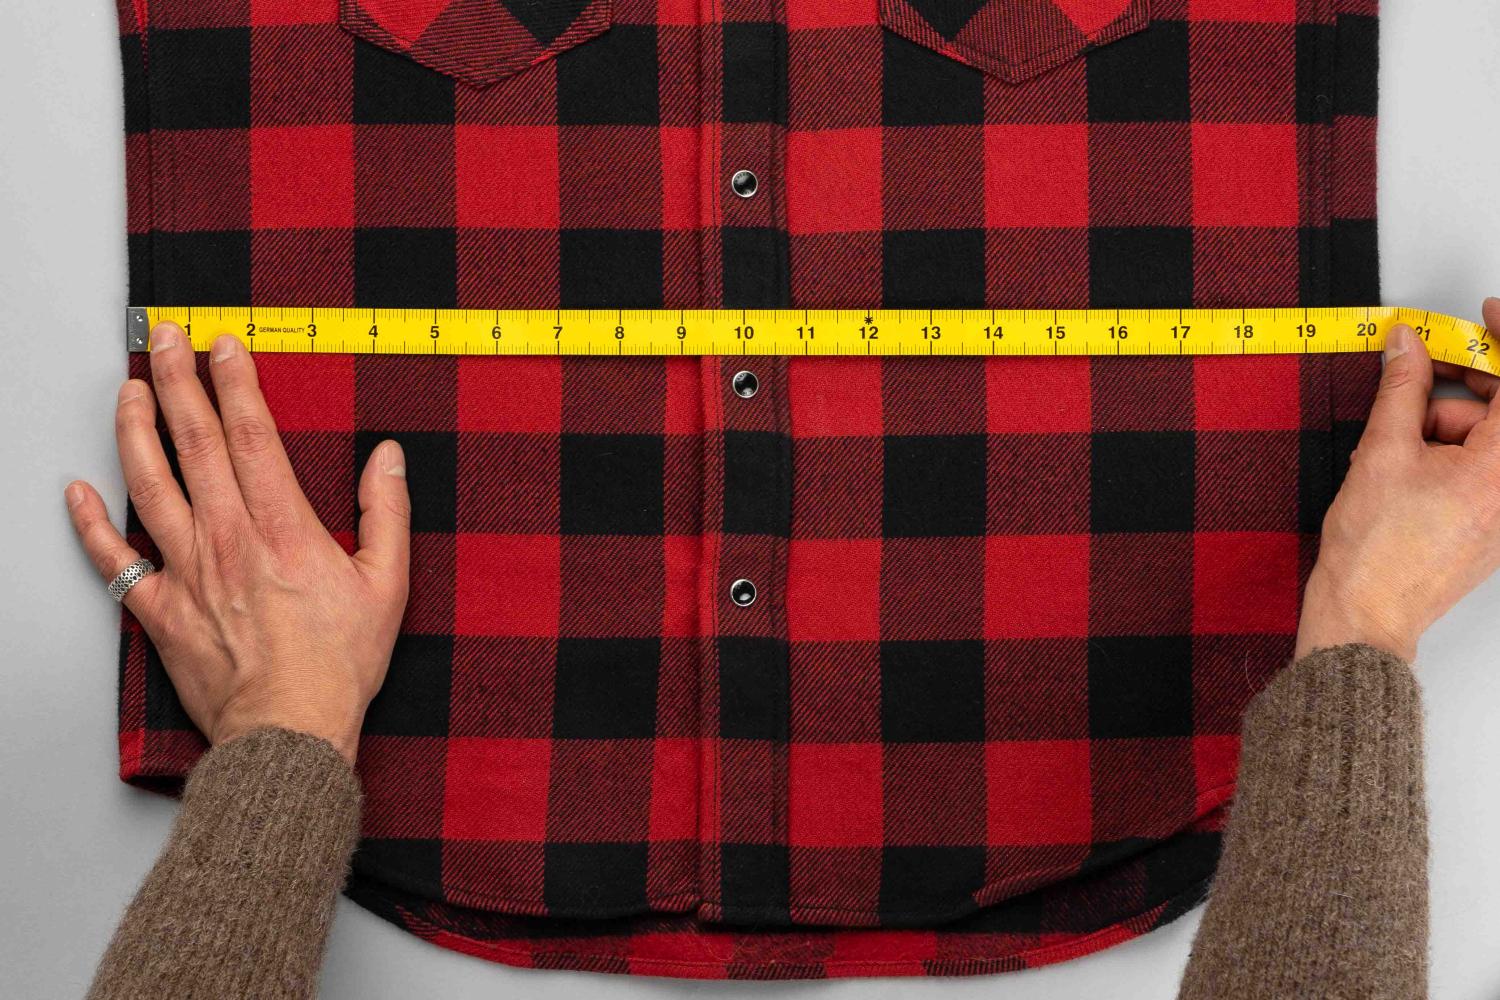
Stage 3: Waist
We measure the narrowest part of the garment outer seam to outer seam between the pit and the opening. If, however, the shirt has gussets, the waist will correspond to the the opening measurement.
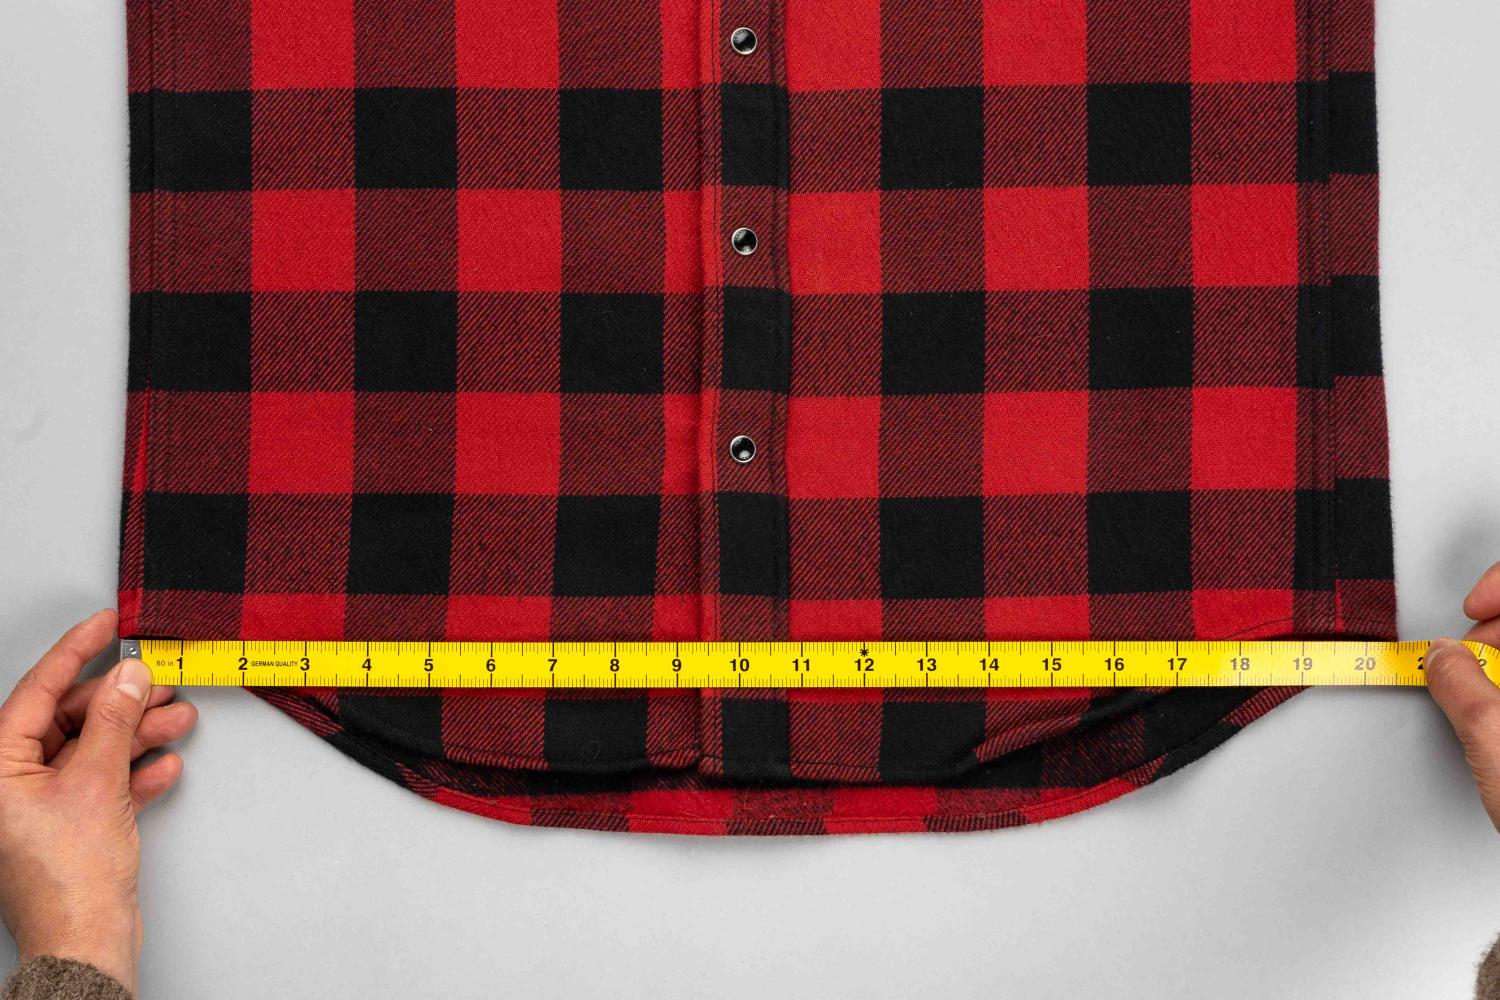
Stage 4: Opening
Here we take a cross measurement from seam to seam at the bottom of the shirt.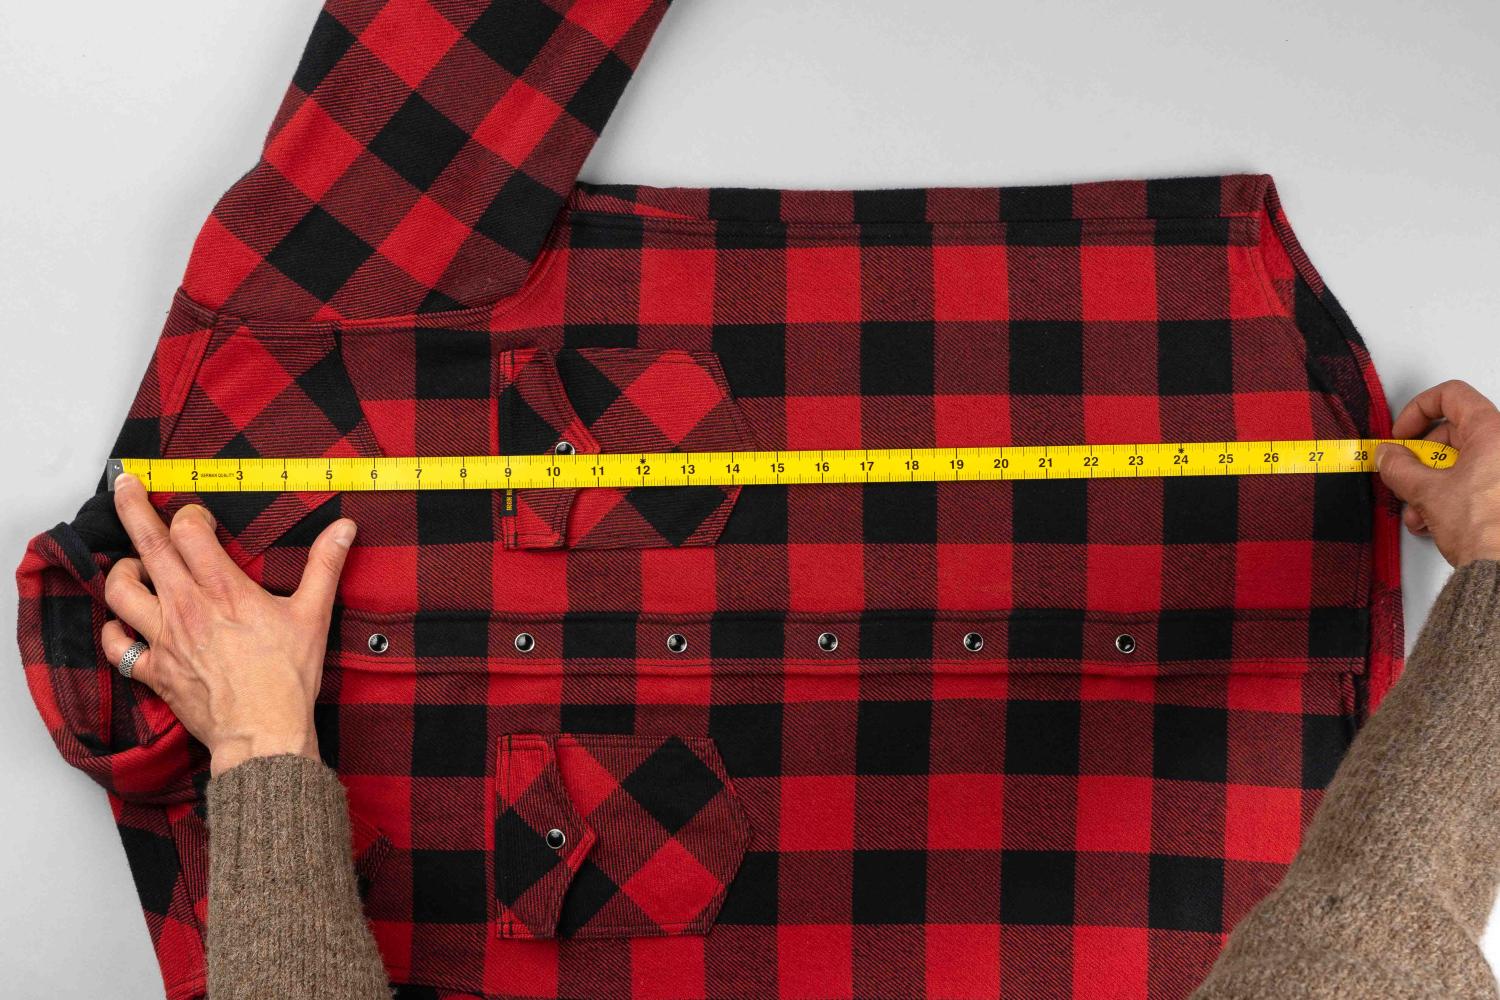
Stage 5: Length
Measure from the top of the shoulder by the collar to the bottom of the garment.
Stage 6: Sleeve
Measure from the top of shoulder seam to the cuff’s edge.
FREE UK delivery on orders over £50.
Shipping costs £8 to UK addresses for orders under £50.
For international orders, please see our full shipping and delivery details.
If you are not completely satisfied with your purchase, you can return it to us within 21 days for an exchange or refund.
For more information, please see our Returns & Exchanges page.